Monday, March 6, 2023

Adding Slide Notes


Slide notes can be very useful tools for presentation. These notes are not displayed on the screen in the Slideshow mode, but the presenter can see them so they can prepare well to present the slides. Depending on your Print settings, you can also print the slide notes along with the slides.

This chapter will show you how to add slide notes to an existing presentation.

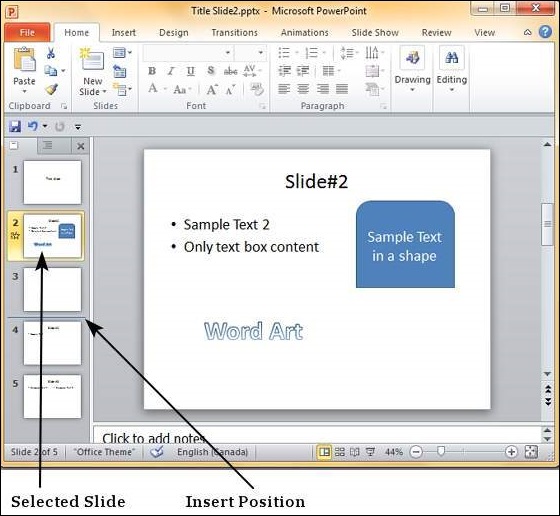
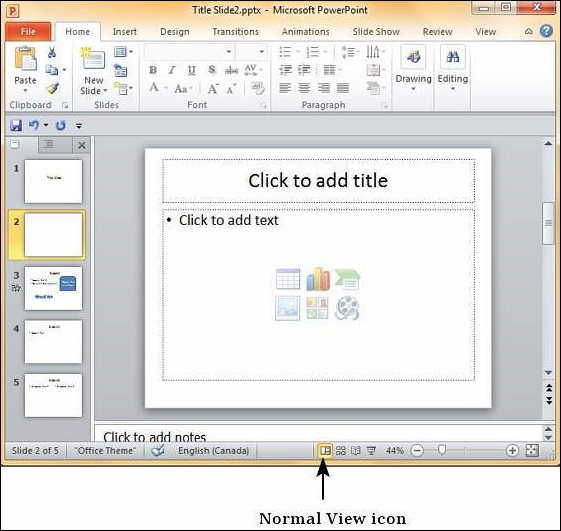
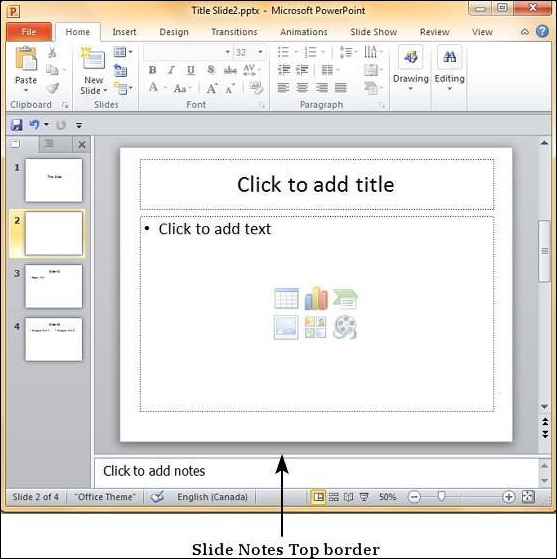
Step 1 − To locate the slide notes, set the view in Normal mode.

Microsoft PowerPoint 2010

Step 2 − The Slide Notes section is indicated by "Click to add notes".

Microsoft PowerPoint 2010

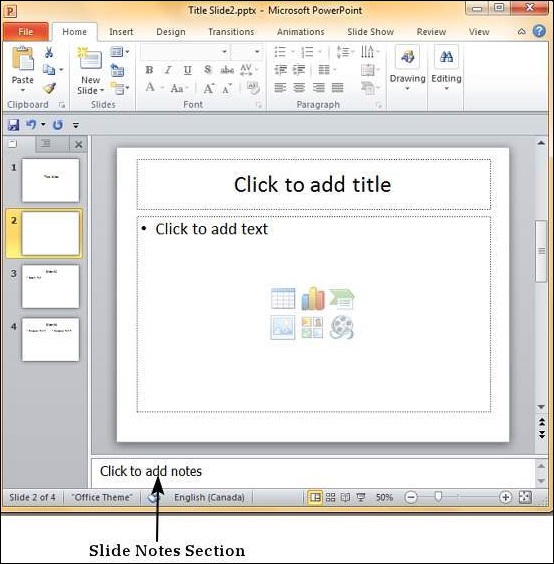
Step 3 − You can click on the top border and drag the section to increase its size to make it easier to type.

Microsoft PowerPoint 2010

Step 4 − Type your text in this section as slide notes.

Microsoft PowerPoint 2010

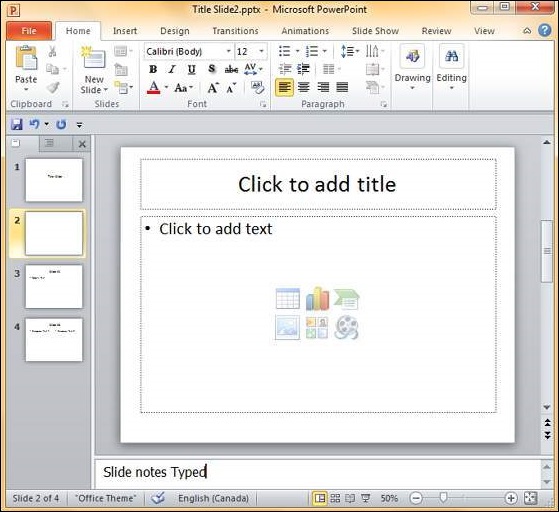
You can only use bullets, numbering and alignment functions in the Slide Notes section. All other functions can be selected, but can be applied only to the selected slide, not the notes.

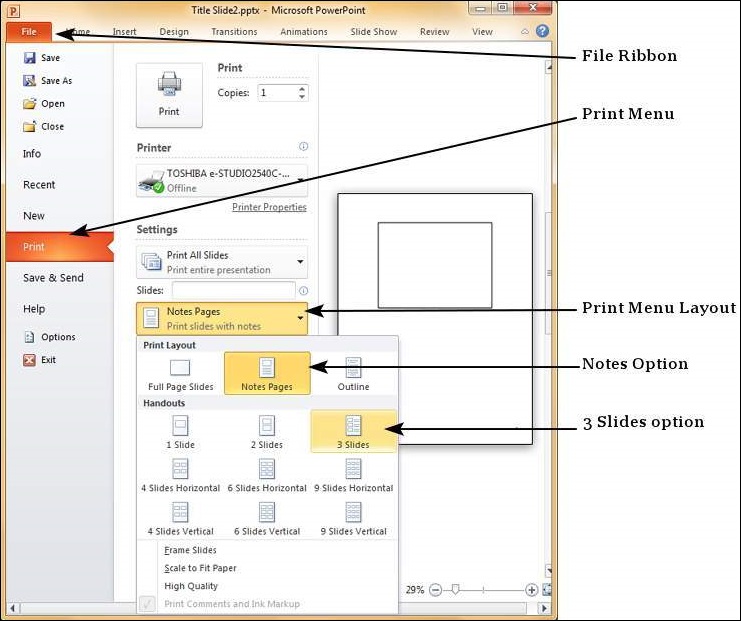
Slide notes can be printed from the print menu under the Backstage view. From the Print Layout option, select Notes Pages or 3 Slides. Notes Pages will print a single slide with the slide notes below it. The 3 Slides will print all three slides with notes on the right side.

Microsoft PowerPoint 2010

Sunday, March 5, 2023

Rearranging Slides


Rearranging slides is important when it comes to organizing the overall presentation flow. While it is vital that you get the right content in every slide, it is equally important that you are able to present them in a format that makes it easier for the audience to understand the content too; most times this will require rearranging the slides.

You can rearrange slides from two views in PowerPoint - Normal View and Slide Sorter View. Given below are the steps to rearrange slides from different views.

Normal View

Step 1 − Select the slide to be moved.

Step 2 − Left click on the slide and drag it to the position in the sequence where you want to place it. PowerPoint will indicate the insert position with a line in-between existing slides.

Microsoft PowerPoint 2010

Step 3 − When you get to the right position release the left click button to insert the slide. Alternately you can also cut the selected slide and paste it back in the sequence as shown below.

Microsoft PowerPoint 2010


Microsoft PowerPoint 2010

Slide Sorter View

Let us now understand how the Slide Sorter View works.

Step 1 − Select the slide to be moved.

Step 2 − Left click on the slide and drag it to the position in the sequence where you want to place it. PowerPoint will indicate the insert position with a line in-between existing slides.

Microsoft PowerPoint 2010

Step 3 − When you get to the right position release the left click button to insert the slide. Alternately you can also cut the selected slide and paste it back in the sequence as shown below.

Microsoft PowerPoint 2010


Microsoft PowerPoint 2010

Deleting Existing Slide


There are times while building a slide deck, you may need to delete some slides. This can be done easily from PowerPoint. You can delete the slides from the Normal view as well as the Slide Sorter view. In each view, you can delete the slides in two ways.

Deleting from Normal View

Step 1 − Go to the Normal view.

Microsoft PowerPoint 2010

Step 2 − Right-click on the slide to be deleted and select the Delete Slideoption.

Microsoft PowerPoint 2010

Alternately, you can select the slide and press the Delete button on your key board.

Deleting from Slide Sorter View

Let us now understand how to deleted slides from the Slide Sorter View.

Step 1 − Go to the Slide Sorter view.

Microsoft PowerPoint 2010

Step 2 − Right-click on the slide to be deleted and select the Delete Slideoption.

Microsoft PowerPoint 2010

Alternately, you can select the slide and press the Delete button on your key board.

Adding Text in Boxes


PowerPoint allows users to add text to the slide in a well-defined manner to ensure the content is well distributed and easy to read. The procedure to add the text in a PowerPoint slide is always the same - just click in the text box and start typing. The text will follow the default formatting set for the text box, although this formatting can be changed later as required. What changes is the different kinds of content boxes that support text in a PowerPoint slide.

Given below are some of the most common content blocks you will see in PowerPoint.

Title Box

This is typically found on slides with the title layout and in all the slides that have a title box in them. This box is indicated by "Click to add title".

Microsoft PowerPoint 2010

Subtitle Box

This is found only in slides with the Title layout. This is indicated by "Click to add subtitle"

Content Box

This is found in most of the slides that have a placeholder for adding content. This is indicated by "Click to add text". As you can see, this box allows you to add text as well as non-text content. To add text to such a box, click anywhere on the box, except on one of the content icons in the center and start typing.

Microsoft PowerPoint 2010

Text Only Box

This is not a default content box available in PowerPoint, but you can create it using Slide Master, if required. This is also indicated by "Click to add text". The only difference between the Text Only Box and the Content Box is that the former only supports text in the content area.

Microsoft PowerPoint 2010

Wednesday, March 1, 2023

Add New Slides


In this chapter, we will understand how to add new slides in an existing presentation. Here are the steps that allow you to insert a new slide in the deck −

Step 1 − Right-click in the Navigation Pane under any existing slide and click on the New Slide option.

Add New Slide

Step 2 − The new slide is inserted. You can now change the layout of this slide to suit your design requirements.

New PowerPoint Slide

Step 3 − To change the slide layout, right-click on the newly inserted slide and go to the Layout option where you can choose from the existing layout styles available to you.

Microsoft Office 2010

You can follow the same steps to insert a new slide in between existing slides or at the end on the slide list.

When we insert a new slide, it inherits the layout of its previous slide with one exception. If you are inserting a new slide after the first slide (Title slide), the subsequent slide will have the Title and Content layout.

You will also notice that if you right-click in the first step without selecting any slide the menu options you get are different, although you can insert a new slide from this menu too.

Microsoft Office 2010

Monday, February 27, 2023

Create Presentation


PowerPoint offers a host of tools that will aid you in creating a presentation. These tools are organized logically into various ribbons in PowerPoint. The table below describes the various commands you can access from the different menus.

Excel Window

Menu CategoryRibbon Commands
HomeClipboard functions, manipulating slides, fonts, paragraph settings, drawing objects and editing functions.
InsertInsert tables, pictures, images, shapes, charts, special texts, multimedia and symbols.
DesignSlide setup, slide orientation, presentation themes and background.
TransitionsCommands related to slide transitions.
AnimationsCommands related to animation within the individual slides.
Slide ShowCommands related to slideshow set up and previews.
ReviewProofing content, language selection, comments and comparing presentations.
ViewCommands related to presentation views, Master slides, color settings and window arrangements.

Besides these depending on the objects selected in the slide, there are other menu tabs that get enabled.

Sunday, February 26, 2023

Backstage View


In Office 2010, Microsoft replaced the traditional file menu with the new Backstage view. This view not only offers all the menu items under the file menu, but additional details which makes management of your files a lot easier.

Accessing Backstage View

You can access the Backstage view simply by clicking on the File tab. You can exit this view by clicking on any tab (including the File tab again). You can also press the 'Esc' button on the keyboard.

PowerPoint Backstage

Organization of Backstage View

The backstage view has three sections or panes.

PowerPoint Backstage

  • First Pane − This is the commands pane which consists of all the commands you would typically find in the file menu of older versions. You also have the Options menu which lets you edit the options on the program like customizing the ribbon.

Various commands under the first pane are described in the table below −

S.NoCommand & Description
1

Save

This allows you to save a new file or an existing file in standard format. If you are working on a previously saved file this will save the new changes in the same file format. If you are working on a new file, this command would be similar to the Save As command.

2

Save As

Allows you to specify the file name and the file type before saving the file.

3

Open

Allows you to open new PowerPoint files.

4

Close

Allows you to close an existing file.

5

Info

Displays the information about the current file.

6

Recent

Lists series of recently viewed or edited PowerPoint files.

7

New

Allows you to create a new file using blank or pre-defined templates.

8

Print

Allows you to select the printer settings and print the presentation.

9

Save & Send

Allows you to share your presentation with larger audience via emails, web, cloud services, etc.

10

Help

Provides access to PowerPoint Help.

11

Options

Allows you to set various options related to PowerPoint program.

12

Exit

Closes the presentation and exits the program.

  • Second Pane − This is the subcommands pane. This will list all the commands related to the main command you choose in the first pane. For example, if you select Print in the first pane, you get to choose the printer and adjust the print settings in the second pane.

  • Third Pane − This is the preview or file information page. Depending on the command and the subcommand you select, this pane will either display the properties of the file or give you a preview of the file.

Copy and paste in PowerPoint

Copying and pasting in PowerPoint for the web differs from copying and pasting in the PowerPoint desktop application because of ...