Monday, February 20, 2023

Compare Documents


In this chapter, we will discuss how to compare documents in Word 2010. Sometime you modify a Microsoft Word document without turning on the Track Changes mode; in such cases, tracking the changes becomes difficult and you will have to compare the original document with the modified document word by word. But you do not need to compare it manually, Microsoft Word provides an option to compare two documents very easily. Let us see how it can be done.

Compare Two Documents

Let us have the following two documents, (a) Original document (b) Modified version of the same document as follows

Original Document

Original Document

Modified Document

Modified Document

The following steps will help you compare the two documents.

Step 1 − Click the Review tab and then click the Compare button. This will display the two options to be selected.

Compare Option

Step 2 − Select the Compare option simply by clicking over it. This will display a Compare Documents dialog box asking for the two versions of the Word document that need to be compared with each other.

Compare Documents

Step 3 − Select the Original Document and the Revised Document and click the OK button to display the differences in two documents. Left column on the screen would show all the changes done over the course of changes and you will see original as well as modified version of the document on the same screen. You can walk through these changes using the Previous & Nextbutton available under the Review tab.

Documents Comparison

NOTE − While comparing two documents you can use the different settings available at the Compare Documents dialog box under the More button.

Friday, February 17, 2023

Translate Word


In this chapter, we will discuss how to translate a Word 2010 document. Microsoft Word has an option to translate a complete Word document from one language to another language using simple step. Let us learn how we can translate document content from English to some other language (Spanish).

Translate Document Using Microsoft Translator

The following steps will help you translate a document from one language to another language.

Step 1 − Click the Review tab and then click the Translate button; this will display different options to be selected.

Translate Document

Step 2 − Select the Choose Translation Language option simply by clicking over it. This will display a Translation Language Options dialog box asking for selecting from and to languages. Here From is the source document's language and To is the target document’s language.

Translation Language Options

Step 3 − After selecting From Language and To Language, click OK. Now again go to Review tab and then click Translate button which will display different options to be selected. Select top option Translate Documentoption from the given options, this will display Translate Whole Documentdialog box asking for your permission to send your document over the internet to be translated by Microsoft Translator.

Translate Whole Document

Step 4 − To translate your document, you can click the Send button. This will send your document over the internet to be translated and you will have your document translated in your target language.

Translated Document

Step 5 − Now you can copy your translated content manually in any other document and save it for final use.

Thursday, February 16, 2023

Email Documents


In this chapter, we will discuss how to email documents using Word 2010. Microsoft Word can be used to send a Word document in an email as an attachment directly at the given email address without opening your email program. This chapter will teach you simple ways of sending email in a variety of formats, including a Word document file (DOC) attachment or a PDF, among others.

Mailing Documents

Following are the simple steps to send a word document as an attachment at the given email address.

Step 1 − Open the document you want to send using e-mail as an attachment.

Step 2 − Click the File tab and then click the Save & Send option from the left most column; this will display a number of options to Save & Send, you will have to select the Send using Email option available in the middle column.

Send Email Options

Step 3 − The third column will have various options to send email which allows you to send your document as an attachment in DOC format or you can send your Word document in a PDF format. Click a method to send the document. I'm going to send my document in PDF format.

When you click the Send as PDF option, it displays the following screen where you can type the email address to which you want to send your document, email subject and other additional messages as well. To send email to multiple recipients, separate each e-mail address with a semicolon (;) and a space.

Wednesday, February 15, 2023

Printing Documents


In this chapter, we will discuss how to print documents in Word 2010. Consider you are done with previewing and proofing your document and ready for the final printing. This chapter will teach you how to print a part or a complete Microsoft Word document.

Printing Documents

The following steps will help you print your Microsoft Word document.

Step 1 − Open the document for which you want to see the preview. Next click the File tab followed by the Print option which will display a preview of the document in the right column. You can scroll up or scroll down your document to walk through the document using given Scrollbar. The middle column gives various options to be set before you send your document to the printer.

Print Preview

Step 2 − You can set various other printing options available. Select from among the following options, depending on your preferences.

Print Options

S.NoOption and Description
1

Copies

Set the number of copies to be printed; by default, you will have one copy of the document.

2

Print Custom Range

This option will be used to print a particular page of the document. Type the number in Pages option, if you want to print all the pages from 7 till 10 then you would have to specify this option as 7-10 and Word will print only 7th, 8th, 9th and 10th pages.

3

Print One Sided

By default, you print one side of the page. There is one more option where you will turn up your page manually in case you want to print your page on both sides of the page.

4

Collated

By default, multiple copies will print Collated; if you are printing multiple copies and you want the copies uncollated, select the Uncollated option.

5

Orientation

By default, page orientation is set to Portrait; if you are printing your document in landscape mode then select the Landscape mode.

6

A4

By default, the page size is A4, but you can select other page sizes available in the dropdown list.

7

Custom Margin

Click the Custom Margins dropdown list to choose the document margins you want to use. For instance, if you want to print fewer pages, you can create narrower margins; to print with more white space, create wider margins.

8

1 Page Per Sheet

By default, the number of pages per sheet is 1 but you can print multiple pages on a single sheet. Select any option you like from the given dropdown list by clicking over the 1 Page Per Sheet option.

Step 3 − Once you are done with your setting, click on the Print button which will send your document to the printer for final printing.

Print Button

Tuesday, February 14, 2023

Preview Documents


In this chapter, we will discuss the preview of documents in Word 2010. When you are ready for printing your Word document, it is always recommended to preview the document before you send the document for final printing. During preview of the document you might discover that the set margin is not appropriate or many items may not look good after printing so better to fix them after having a preview of the document. You can also have the option to specify which pages to print, select a printer, specify the paper size on which you want to print, and set the other printing options.

Preview Documents

The following steps will help you preview your Microsoft Word Document.

Step 1 − Open the document the preview of which you want to see.

Heading Levels

Step 2 − Click the File tab followed by the Print option; this will display a preview of the document in the right column. You can scroll up or scroll down your document to walk through the document using the given Scrollbar. In the next chapter, we will learn how to print the previewed document and how to set different printing options.

Print Preview

Step 3 − Once you are done with your preview, you can click the Home tabto go to the actual content of the document.

Monday, February 13, 2023

Table of Contents


In this chapter, we will discuss how to create table of contents in Word 2010. A table of contents (or TOC) is a list of headings in the order in which they appear in the document. You can set a list of headings which should be a part of the table of contents. Let us learn how to create a Table of Contents. A table of content helps in navigating through a Word document by providing associated page numbers and direct links to various headings available on those pages.

Create Table of Contents

The following will help you to create Table of Contents in your Microsoft Word using various levels of headings.

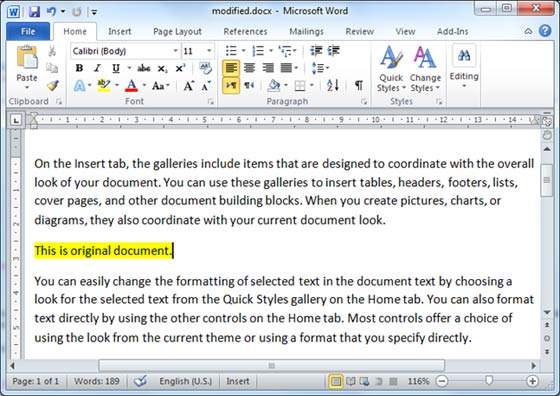
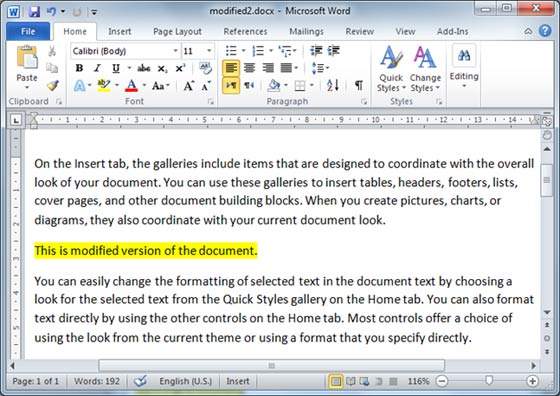
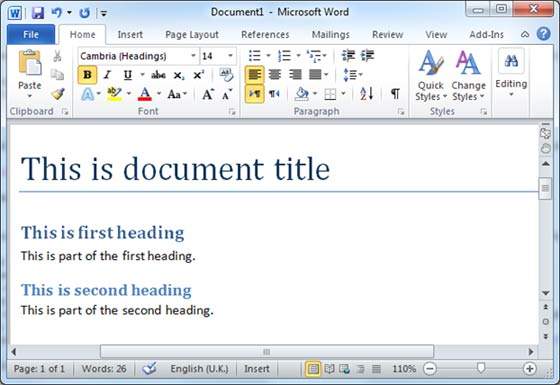
Step 1 − Consider a document having different levels of headings.

Heading Levels

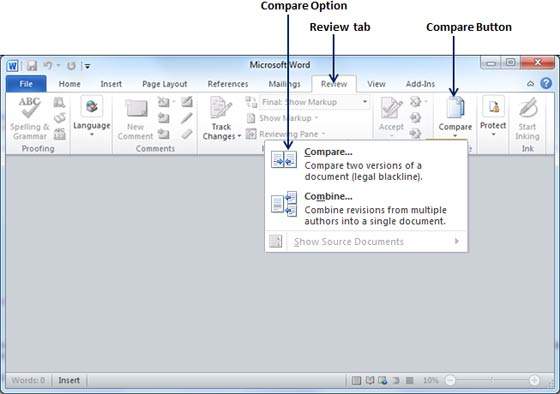
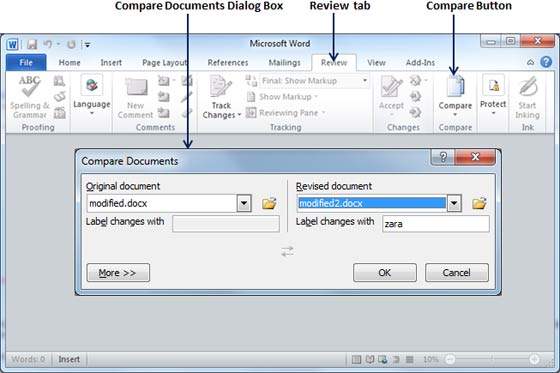
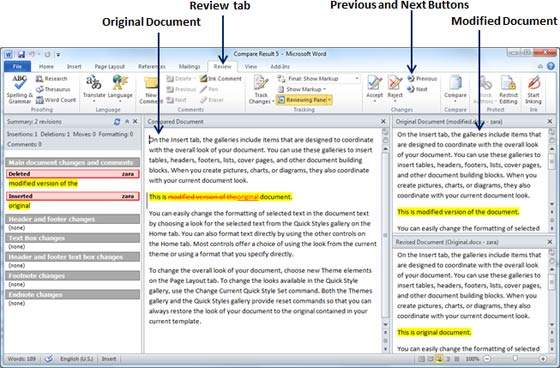
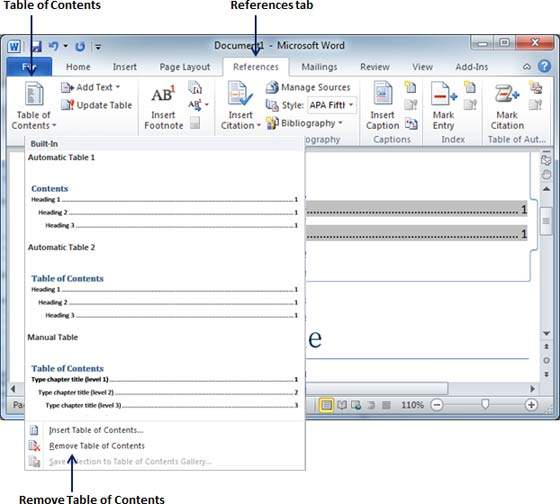
Step 2 − You can insert a table of content anywhere in the document, but the best place is always at the beginning of the document. So bring your insertion point at the beginning of the document and then click the References tabfollowed by the Table of Content button; this will display a list of Table of Contents options.

ToC Options

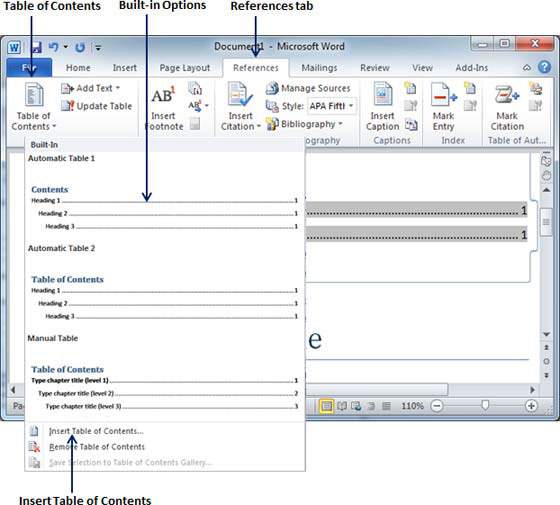
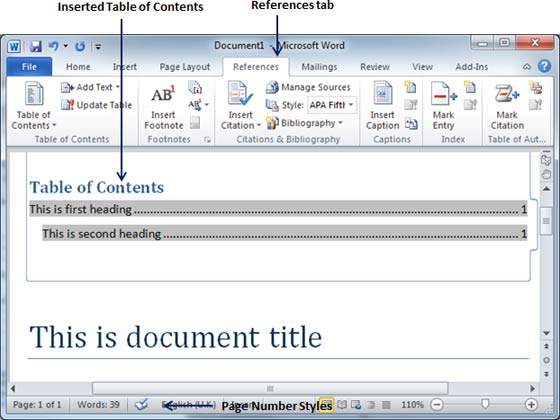
Step 3 − Select any of the displayed options by simply clicking on it. A table of content will be inserted at the selected location.

Table of Content

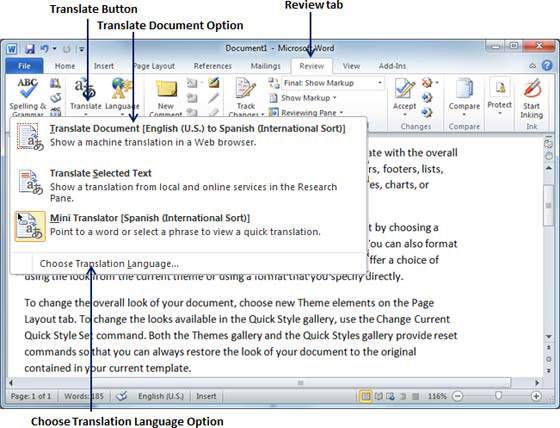
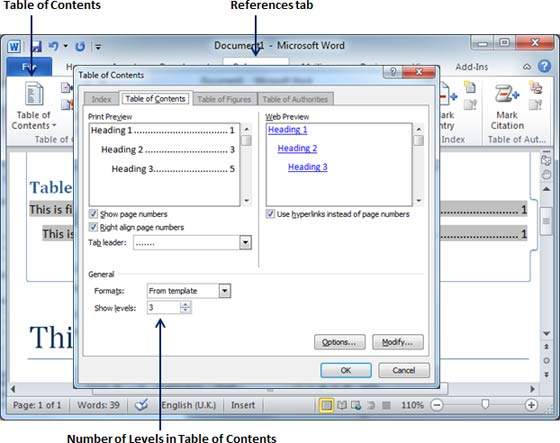
Step 4 − You can select number of levels of headings in your table of content. If you click on the Insert Table of Content option available in the option menu, then it will show you a dialog box where you can select the number of levels you want to have in your table of content. You can turn ON or turn OFF the Show Page Numbers option. Once done, click the OK button to apply the options.

Levels in TOC

Now if you press the Ctrl key and then click over the any link available in the table of content, it will take you directly to the associated page.

Update Table of Contents

When you work on a Word document, then number of pages and their content keep varying and accordingly you need to update your Table of Contents. Following are the simple steps to update an existing Table of Contents in your Microsoft Word.

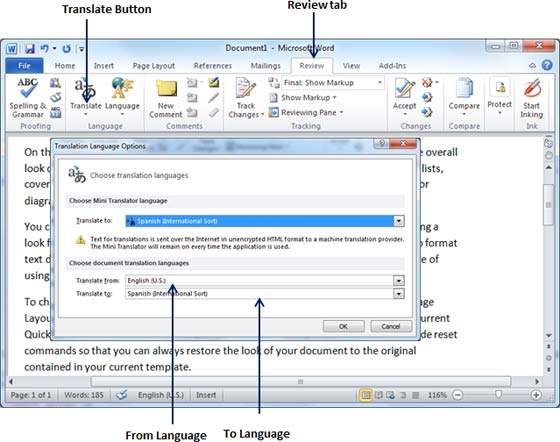
Step 1 − Consider you already have a table of content as shown above. Click the References tab followed by the Update Table button; this will display the Update Table of Contents dialog box with two options.

Update Table of Contents

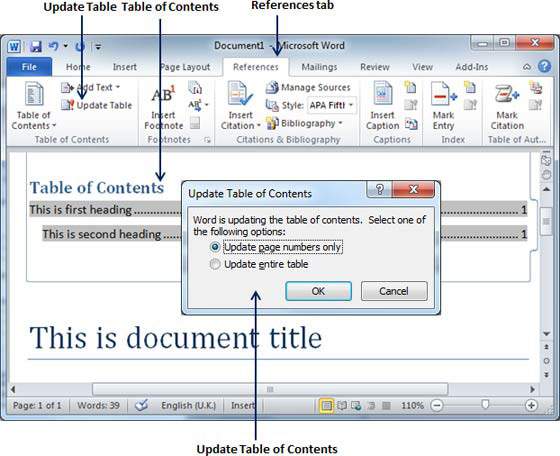
Step 2 − If you want to update just the page numbers then select the first option Update page numbers only available in the dialog box but if you want to update page numbers as well, then select the second option Update entire table and you will find your table of content updated with all the latest changes.

Delete Table of Contents

The following steps will help you delete an existing Table of Contents from Microsoft Word.

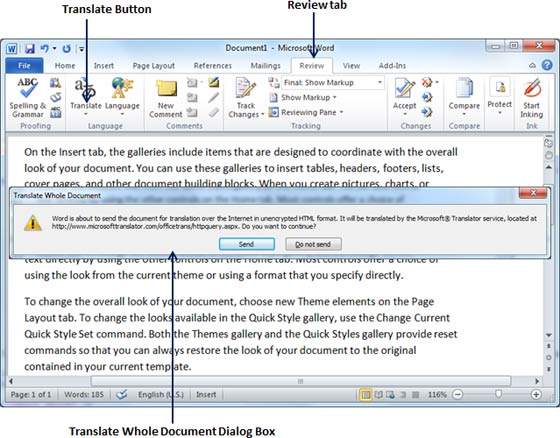
Step 1 − Consider you already have a table of content as shown above. Click the References tab and next Table of Contents button which will display a list of Table of Contents options along with Remove Table of Contentsoption available at the bottom.

Remove Table of Contents

Step 2 − Click over the Remove Table of Contents option to delete the existing table of contents.

Thursday, February 9, 2023

Auto Formatting


In this chapter, we will discuss auto formatting in Word 2010. The AutoFormat feature automatically formats a document as you type it by applying the associated styles to text. Let us learn how to use the auto format option available in Microsoft Word 2010 to format the typed content. For example, if you type three dashes --- and press enter, Word will automatically create a line for you. Similarly, Word will automatically format two dashes - into an em dash (—).

Setting AutoFormat

The following steps will help you set the AutoFormat feature in your Microsoft Word.

Step 1 − Click the File tab, click Options, and then click the Proofing option available in the left most column, it will display the Word Options dialog box.

Word Options

Step 2 − Click the AutoCrrect Options button; this will display the AutoCorrect dialog box and then click the AutoFormat As You Type tab to determine what items Word will automatically format for you as you type.

AutoCorrect Options

Step 3 − Select from among the following options, depending on your preferences.

S.NoOption and Description
1

"Straight quotes" with “smart quotes”

This option will be used to replace the plain quotation characters with curly quotation characters.

2

Fractions (1/2) with fraction character (½)

This option will be used to replace the fractions typed with numbers and slashes with fraction characters.

3

*Bold* and _italic_ with real formatting

This option will be used to format text enclosed within asterisks (*) as bold and text enclosed within underscores ( _ ) as italic.

4

Internet and network paths with hyperlinks

This option will be used to format e-mail addresses and URLs as clickable hyperlink fields.

5

Ordinals (1st) with superscript

This option will be used to format ordinal numbers with a superscript like 1st becomes 1st.

6

Hyphens (--) with dash (—)

This option will be used to replace a single hyphen with an en dash (.) and two hyphens with an em dash (—).

7

Automatic bulleted lists

This option will be used to apply bulleted list formatting to paragraphs beginning with *, o, or - followed by a space or tab character.

8

Automatic numbered lists

This option will be used to apply numbered list formatting to paragraphs beginning with a number or letter followed by a space or a tab character.

9

Border lines

This option will be used to apply paragraph border styles when you type three or more hyphens, underscores, or equal signs (=).

10

Tables

This option will be used to create a table when you type a series of hyphens with plus signs to indicate the column edges. Try with +-----+------+ ) and then press Enter.

11

Built-in heading styles

This option will be used to apply heading styles to heading text.

12

Format beginning of list item like the one before it

This option will be used to replace plain quotation characters with curly quotation characters.

13

Set left- and first-indent with tabs and backspaces

This option sets left indentation on the tab ruler based on the tabs and backspaces you type.

14

Define styles based on your formatting

This option automatically creates or modifies styles based on manual formatting that you apply to your document.

Step 4 − Finally click OK to close the AutoCorrect Options dialog box and again click OK to close the Word Options dialog box.

How to Close a Document in Microsoft Word

Learn the two most common ways to close a Microsoft Word document. This feature works the same in all modern versions of Microso...