Wednesday, February 8, 2023

Auto Correction


In this chapter, we will discuss auto correction in Word 2010. The AutoCorrect feature automatically corrects common typographical errors when you make them. Let us learn how to use the auto correction option available in Microsoft Word 2010 to correct the spelling automatically as you type the words in your documents.

Setting AutoCorrect

The following steps will help to enable the AutoCorrect feature in Microsoft Word.

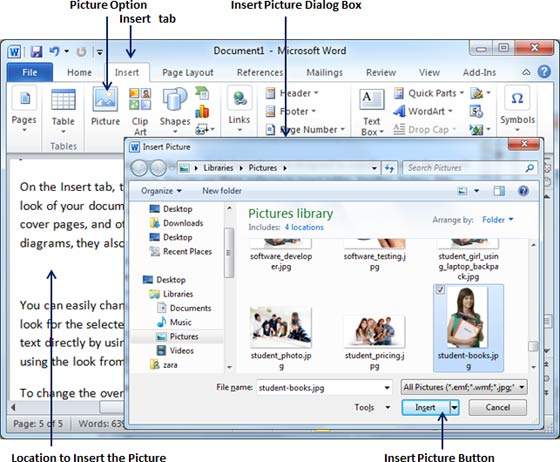
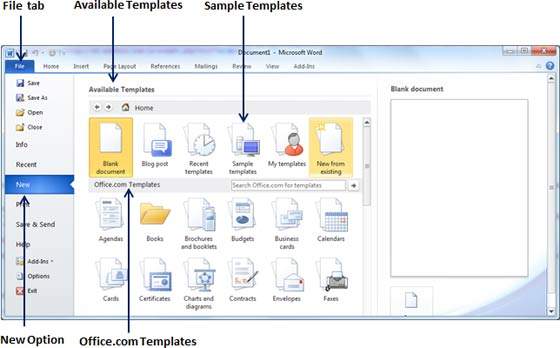
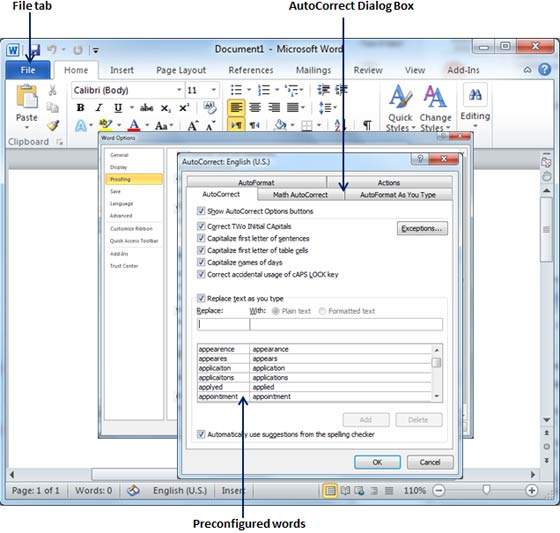
Step 1 − Click the File tab, click Options, and then click the Proofing option available in the left most column, it will display the Word Options dialog box.

Word Options

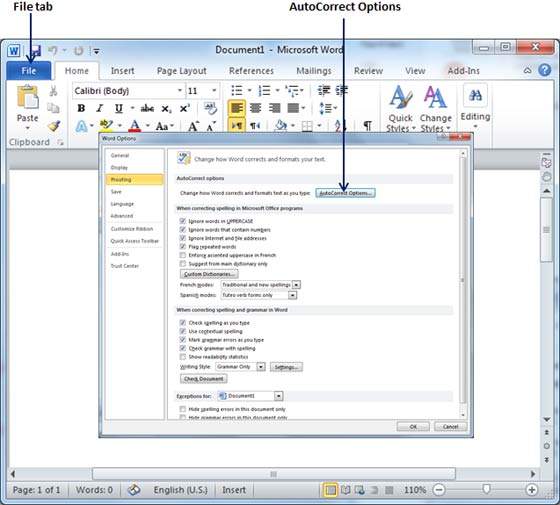
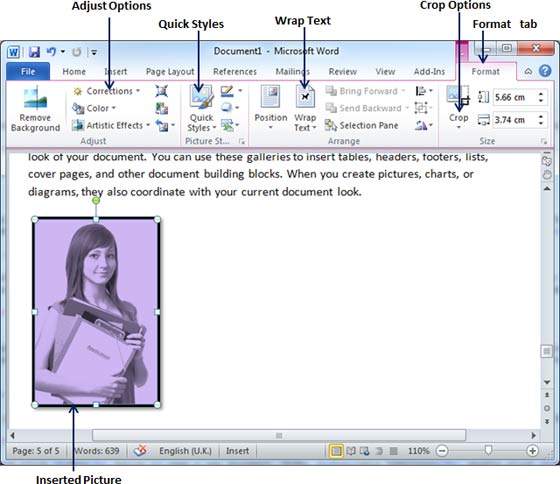
Step 2 − Click the AutoCorrect Options button which will display the AutoCorrect dialog box and then click the AutoCorrect tab. Now you have to make sure all the options are enabled, especially the Replace Text as you type option. It is also recommended to be careful when you turn off an option.

AutoCorrect Options

Step 3 − Select from among the following options, depending on your preferences.

S.NoOption and Description
1

Show AutoCorrect Options Buttons

This option will be used to display a small blue button or bar beneath text that was automatically corrected. Click this button to see a menu, where you can undo the correction or set AutoCorrect options.

2

Correct TWo INitial CApitals

This option changes the second letter in a pair of capital letters to lowercase.

3

Capitalize first letter of sentences

This option capitalizes the first letter following the end of a sentence.

4

Capitalize first letter of table cells

This option will be used to capitalize the first letter of a word in a table cell.

5

Capitalize names of days

This option will be used to capitalize the names of the days of the week.

6

Correct accidental usage of cAPS LOCK key

This option will be used to correct capitalization errors that occur when you type with the CAPS LOCK key depressed and turns off this key.

7

Replace text as you type

This option replaces typographical errors with the correct words as shown in the list beneath it.

8

Automatically use suggestions from the spelling checker

This option tells Word to replace spelling errors with words from the dictionary as you type.

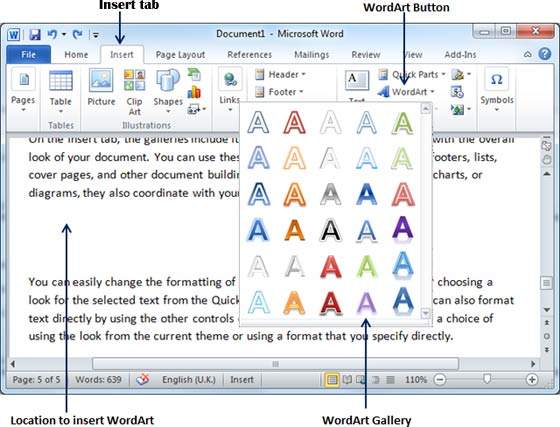
Although Word comes preconfigured with hundreds of AutoCorrect entries, you can also manually add entries using the following dialog box and use the Replace and With text boxes to add more entries. I added an entry for Markiting which should be replaced with Marketing. You can use the Addbutton to add multiple entries.

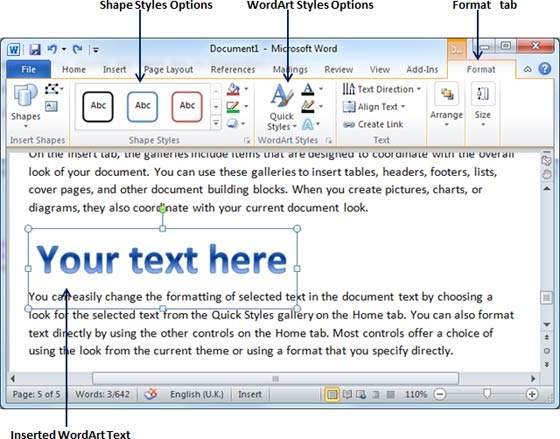
Step 4 − Click OK to close the AutoCorrect Options dialog box and again click OK to close the Word Options dialog box. Now try to type Markitingand as soon as you type this word, Microsoft Word autocorrects it with the correct word Marketing word.

Use Graphics


In this chapter, we will discuss how to use graphics in Word 2010. You can add beauty to your Microsoft Word documents by inserting a variety of graphics. This chapter will teach you two ways of adding graphics.

Adding Picture in Document

The following steps will help you add an existing picture in your word document. It is assumed that you already have a picture available on your machine before you add this picture in your Word document.

Step 1 − Click on your document where you want to add a picture.

Step 2 − Click the Insert tab and then click the Picture option available in illustrations group, which will display the Insert Picture dialog box.

Insert Picture

Step 3 − You can select a required picture using the Insert Picture dialog box. When you will click the Insert button, selected picture will be inserted in your document. You can play with your inserted picture in different ways, like you can apply quick styles to your picture, you can resize it, or you can change its color too. To try it, just -lick your inserted image and Word will give you numerous options available under the Format tab to format your inserted graphics.

Format Picture

You can try yourself to insert other available graphics like Clipart, Different Shapes, Charts and SmartArt or Screenshots.

Adding WordArt in Document

WordArt provides a way to add fancy words in your Word document. You can document your text in a variety of ways. The following steps will help you add WordArt in your document.

Step 1 − Click in your document where you want to add WordArt.

Step 2 − Click the Insert tab and then click the WordArt option available in the Text group; this will display a gallery of WordArt.

Insert WordArt

Step 3 − You can select any of the WordArt style from the displayed gallery by clicking on it. Now you can modify the inserted text as per your requirement and you can make it further beautiful by using different options available. To try it, just double-click your inserted WordArt and Word will give you numerous options available from the Format tab to format your image. Most frequently used options are Shape Styles and WordArt Styles.

Format WordArt

You can try yourself to apply different options on the inserted WordArt by changing its shape styles, colors, WordArt Styles, etc.

Monday, February 6, 2023

Use Templates


In this chapter, we will discuss how to use templates in Word 2010. Microsoft Word template is a collection of styles which defines paragraph styles for regular text paragraphs, a title, and different levels of headings. You can use any of the already existing templates for your Word document or you can design a template which can be used for all your company documents.

Using Existing Template

We will now understand how to use an already existing template for your newly created word document. A template is selected at the time when you create a new blank document.

Step 1 − To start a new document, click the File tab and then click the Newoption; this will display the Available Templates.

Available Templates

Step 2 − Microsoft Word provides a list of templates arranged under Sample Templates or you can download hundreds of templates from office.comwhich are arranged in different categories. We will use Sample Templates for our document. For this, we need to click over Sample Templates; this will display a gallery of templates. You can try using the office.com option to select a template based on your requirement.

Sample Templates

Step 3 − You can browse a list of available templates and finally select one of them for your document by double-clicking over the template. We will select Equity Report template for our report requirement. While selecting a template for your document, you should select the Document Optionavailable in the third column. This opens your document with predefined setting with which you can modify document title, author name, heading, etc. based on your document requirement.

Selected Template

Create New Template

You can create a fresh new template based on your requirement or you can modify an existing template and save it for later use as a template. A Microsoft Word template file has an extension of .dotx. The following steps will help you create a new template.

Step 1 − To create a new template using an existing template, click the Filetab and then click the New option; this will display the Available Templatesto be selected. Select any of the available template and open it with the Template Option turned on.

Template Option

Step 2 − You can now modify an open template as per your requirements and once you are done, you can save this template with a .dotx extension which is a standard extension for Microsoft Word Templates.

Modified Template

You can create a template from a new document as well. Click the File button, and click New option to open a new document. Under Available Templates, double click Blank Document to create a new document template. Save the template with a unique name and .dotx extension.

You can save the created template anywhere you click and whenever you like to use this template, just double-click over the template file and it will open a new template based document for you.

Friday, February 3, 2023

Quick Styles


In this chapter, we will discuss how to apply quick styles in Word 2010. Microsoft Word provides a gallery of Quick Styles that you can apply to headings, titles, text, and lists. Quick styles come with canned formatting choices, such as font, boldface, and color which we will understand in this chapter.

Apply Quick Styles

The following steps will help you understand how to apply quick styles to a selected portion of text.

Step 1 − Select a portion of text to which you want to apply some style. Using style, you can change the selected portion of text as a heading or subheading or title of the document. You can try using different styles on your text based on your requirement.

Step 2 − Click the Home tab and then move your mouse pointer over the available styles in the Style Gallery. You will see that the selected portion of text will change its style based on the selected style. You can display more available styles by clicking the More Style button.

Style Gallery

Step 3 − Finally, to apply a selected style, click over the style and you will find that it is has been applied on the selected portion of text.

Applied Style Text

You can bring a text to its normal appearance by selecting the Normal style available in the Style Gallery.

Change Styles

The Change Style function allows you to change the default font, color, paragraph spacing and style set for a document. The following steps will help you change the default style.

Step 1 − Open the document the style of which needs to be changed. Click the Home tab and then click the Change Styles button; this will show you all the options that can be changed. You can change the Style, the Font, the Color and the Spacing of the paragraph.

Change Style Options

Step 2 − If the style set needs to be changed, click the Style Set option; this will display a submenu to select any of the available style set. When you move your mouse over the different style sets, you will get real time text preview to give an idea about the final result.

Set Style Menu

Step 3 − To apply a selected style set, click over the style set and you will find that it is has been applied on your document.

Applied Style Set

Similarly, you can try applying Font, Color and Paragraph Spacing. You can try these options yourself.

Wednesday, February 1, 2023

Borders & Shades


In this chapter, we will discuss how to apply table borders and shades in Word 2010. Microsoft Word allows you to place a border on any or all of the four sides of a table very similar to text, paragraphs, and pages. You can also add shades to table rows and columns. This chapter will teach you how to add borders (left, right, top or bottom) around a table and how to add different shades to various rows and columns of the table.

Add Borders to Table

The following steps will help you add borders in a table cell available in Word document.

Step 1 − Select the table to which you want to add border. To select a table, click over the table anywhere which will make the Cross icon visible at the top-left corner of the table. Click this cross icon to select the table.

Step 2 − Click the Border button to display a list of options to put a border around the selected table. You can select any of the option available by simply clicking over it.

Table Border

Step 3 − Try to add and remove different borders like left, right, top or bottom by selecting different options from the border options.

Table Border2

Step 4 − You can apply border to any of the selected row or column. You can try it yourself.

Step 5 − To delete the existing border, simply select the No Border option from the border options.

Using Border Options

You can add borders of your choice to word table by following the simple steps given below.

Step 1 − Click the Border button to display a list of options to put a border. Select the Border and Shading option available at the bottom of the list of options as shown in the above screenshot. This will display a Border and Shading dialog box. This dialog box can be used to set borders and shading around a selected table.

Table Border Options

Step 2 − Click the Border tab; this will display a list of border settings, styles and options whether this border should be applied to the table or text or paragraph.

Step 3 − You can use the Preview section to disable or enable left, right, top or bottom borders of the selected table or row or column. Follow the given instructions in the preview section itself to design the border you like.

Step 4 − You can customize your border by setting its color, width by using different width thickness available under the style section.

Stylish Table Border

Add Shades To Table

The following steps will help you add shades on a selected table or its rows or columns.

Step 1 − Select a row or column where you want to apply a shade of your choice.

Selected Table Row

Step 2 − Click the Border button to display a list of options to put a border. Select the Border and Shading option available at the bottom of the list of options. This will display a Border and Shading dialog box. This dialog box can be used to set borders and shading around selected row(s) or column(s).

Table Shading

Step 2 − Click the Shading tab which will display options to select fill, colorand style and whether this border should be applied to cell or table or selected portion of text.

Step 3 − You can use the Preview section to have an idea about the expected result. Once you are done, click the OK button to apply the result.

Tuesday, January 31, 2023

Add Formula


In this chapter, we will discuss how to add formula to a table in Word 2010. Microsoft Word allows you to use mathematical formula in table cells which can be used to add numbers, to find the average of numbers, or find the largest or the smallest number in table cells you specify. There is a list of formulae, you can choose from the many based on the requirement. This chapter will teach you how to use formula in word tables.

Add a Formula

Following are the simple steps to add formula in a table cell available in Word document.

Step 1 − Consider the following table with the total number of rows. Click in a cell that should contain the sum of the rows.

Salary Table

Step 2 − Now click the Layout tab and then click the Formula button; this will display a Formula Dialog Box which will suggest a default formula, which is =SUM(LEFT) in our case. You can select a number format using Number Format List Box to display the result or you can change the formula using the Formula List Box.

Formula Dialog Box

Step 3 − Now click OK to apply the formula and you will see that the left cells have been added and the sum has been put in the total cell where we wanted to have it. You can repeat the procedure to have the sum of other two rows as well.

Sum Result

Cell Formulae

The Formula dialog box provides the following important functions to be used as formula in a cell.

S.NoFormula & Description
1

AVERAGE( )

The average of a list of cells

2

COUNT( )

The number of items in a list of cells

3

MAX( )

The largest value in a list of cells

4

MIN( )

The smallest value in a list of cells

5

PRODUCT( )

The multiplication of a list of cells

6

SUM( )

The sum of a list of cells

We assume you are familiar with how to create a spreadsheet program; you can construct your word cell formula. Word formulae uses a reference system to refer to an individual table cells. Each column is identified by a letter, starting with A for the first column, B for the second column, and so on. After the letter comes the row number. Thus, the first cell in the first row is A1, the third cell in the fourth row is C4, and so on.

Following are useful points to help you in constructing a word cell formula.

S.NoCell References and Description
1A single cell reference, such as B3 or F7
2A range of cells, such as A4:A9 or C5:C13
3A series of individual cells, such as A3, B4, C5
4ABOVE, referring to all cells in the column above the current cell.
5BELOW, referring to all cells in the column below the current cell.
6LEFT, referring to all cells in the row to the left of the current cell
7RIGHT, referring to all cells in the row to the right of the current cell

You can also construct simple Math expressions, such as B3+B5*10 by using simple mathematical operators +, -, /, *, %.

Monday, January 30, 2023

Split Cells


In this chapter, we will discuss how to split table cells in Word 2010. Microsoft Word allows splitting a cell into multiple cells. We will understand how to split a cell into multiple smaller sub-cells.

Split a Cell

The following steps will help you split a cell into two sub-cells of a table available in word document.

Step 1 − Bring your mouse pointer position inside the cell that has to be divided into multiple cells.

Selected Cell

Step 2 − Now click the Layout tab and then click the Split Cells button; this will display a dialog box asking for the number of rows and columns to be created from the selected cell.

Cell Dialog Box

Step 3 − Select the desired number of rows and columns that have to go into the resultant cell and finally click the OK button to apply the result.

Split Cell

You can divide a cell into multiple cells either row-wise or column-wise or both.

Copy and paste in PowerPoint

Copying and pasting in PowerPoint for the web differs from copying and pasting in the PowerPoint desktop application because of ...