In this chapter, we will discuss how to work with rows and columns in Word 2010. As discussed in the previous chapter, a table is a structure of vertical columns and horizontal rows with a cell at every intersection. A Word table can contain as many as 63 columns but the number of rows is unlimited. This chapter will teach you how to add and delete rows and columns in a table.
Add a Row
Following are the simple steps to add rows in a table of a word document.
Step 1 − Click a row where you want to add an additional row and then click the Layout tab; it will show the following screen.
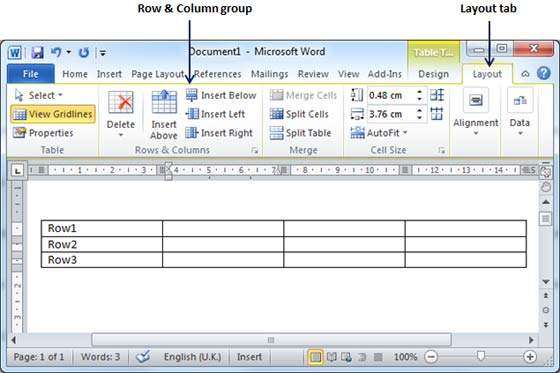
Step 2 − Now use the Row & Column group of buttons to add any row below or above to the selected row. If you click the Insert Below button, it will add a row just below the selected row as follows.
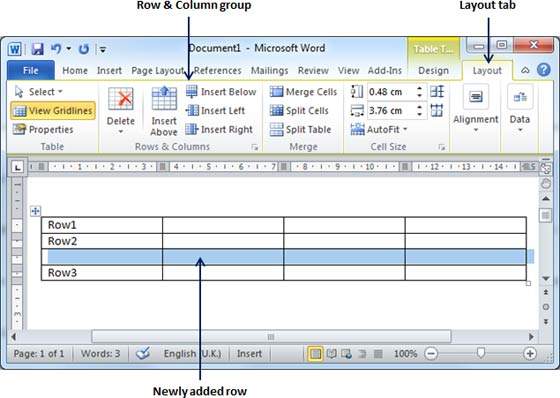
If you click the Insert Above button, it will add a row just above the selected row.
Delete a Row
The following steps will help you delete rows from a table of a Word document.
Step 1 − Click a row which you want to delete from the table and then click the Layout tab; it will show the following screen.
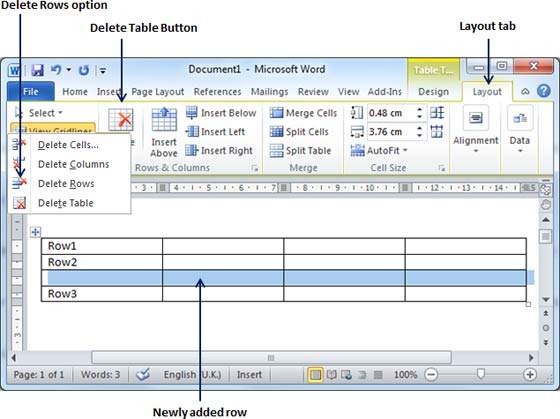
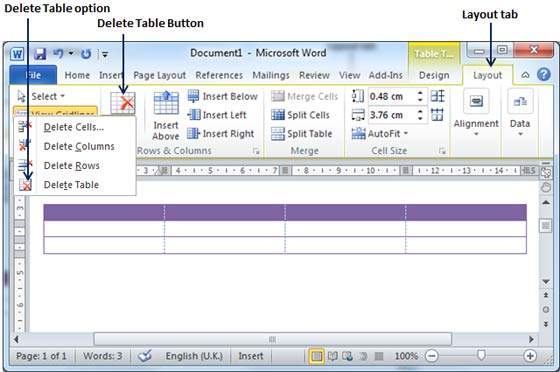
Step 2 − Click the Layout tab, and then click the Delete Rows option under the Delete Table Button to delete the selected row.
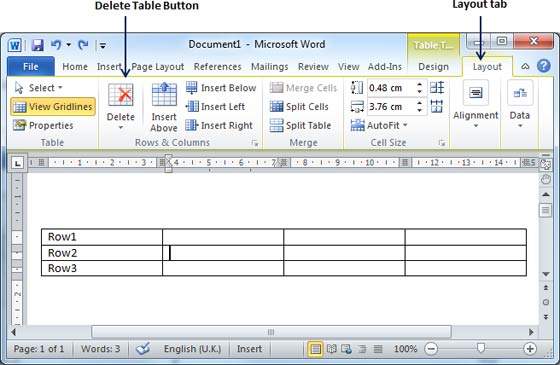
Add a Column
The following steps will help you add columns in a table of a Word document.
Step 1 − Click a column where you want to add an additional column and then click the Layout tab; it will show the following screen.
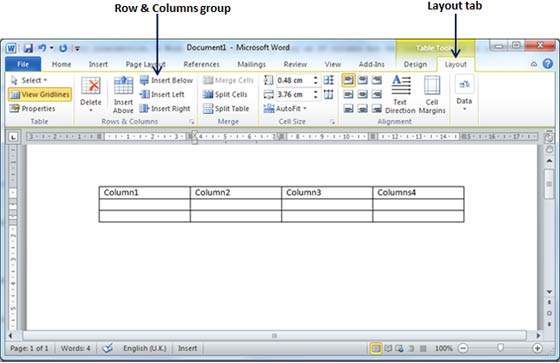
Step 2 − Now use the Row & Column group of buttons to add any column to the left or right of the selected column. If you click the Insert Left button, it will add a column just left to the selected column as follows.
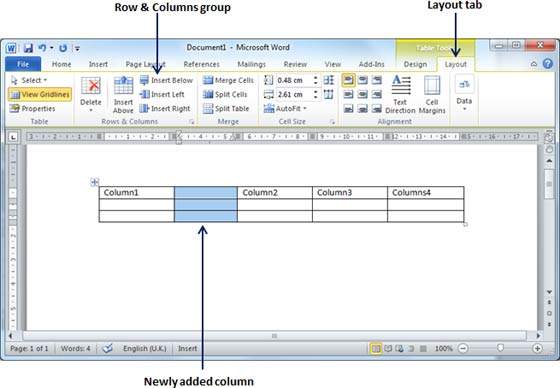
If you click the Insert Right button, it will add a column just next to the selected column.
Delete a Column
Following are the simple steps to delete columns from a table of a word document.
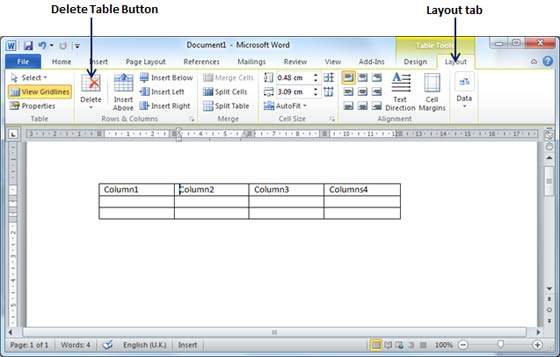
Step 1 − Click a column which you want to delete from the table and then click the Layout tab; it will show the following screen.
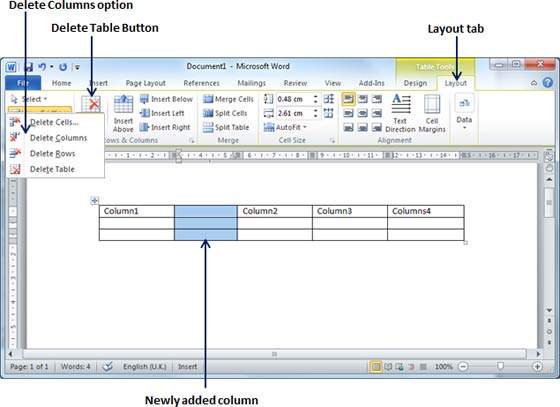
Step 2 − Click the Layout tab, and click the Delete Column option under the Delete Table Button to delete the selected column.
![]()
