In this chapter, we will discuss the how to indent paragraphs in Word 2010. As you know the margin settings determine the blank space that appears on each side of a paragraph. You can indent paragraphs in your document from the left margin, the right margin, or both the margins. This chapter will teach you how to indent your paragraphs with or without the first line of the paragraphs.
Left Indentation
Left indentation means to move the left edge of the paragraph inward towards the center of the paragraph. Let us use the following steps to create left indentation.
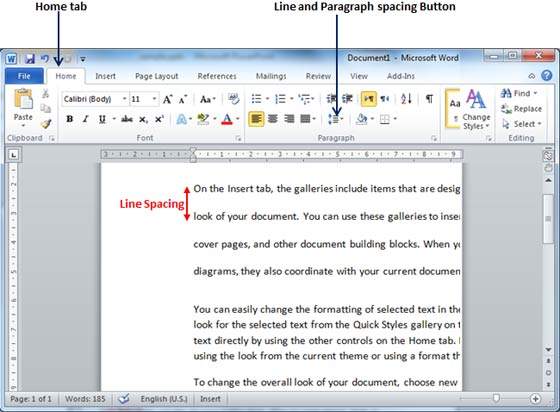
Step 1 − Click anywhere on the paragraph you want to indent left and click the Increase Indent button available on the Home tab or simply press the Ctrl + M keys. You can click multiple times to create deeper indentation.

Step 2 − You can remove left indentation by clicking the Decrease Indentbutton available on Home tab or simply press Ctrl + Shift+ M keys. You can click multiple times to remove deeper indentation.
You can also use the Paragraph Dialog Box to set left and right indentations. We will see this dialog box in the last section of this chapter.
Right Indentation
Right indentation means to move the right edge of the paragraph inward towards the center of the paragraph. Let us use the following steps to create right indentation.
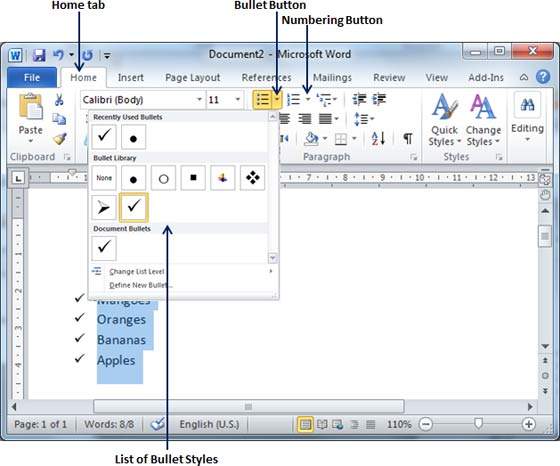
Step 1 − Click anywhere on the paragraph you want to indent and then click on the Increase Right Indent spinner available on the Page Layout tab. You can click on the spinner multiple times to create deeper indentation. You can use the Left Indent spinners as well to set left indentation from the same place.

Step 2 − You can remove right indentation by clicking the Decrease Right Indent spinner in the opposite direction.
You can also use the Paragraph Dialog Box to set the left and the right indentations. We will see this dialog box in the next section.
First Line Indentation
You can move the left side of the first line of a paragraph inward toward the center. Let us see the procedure to perform first line indentation.
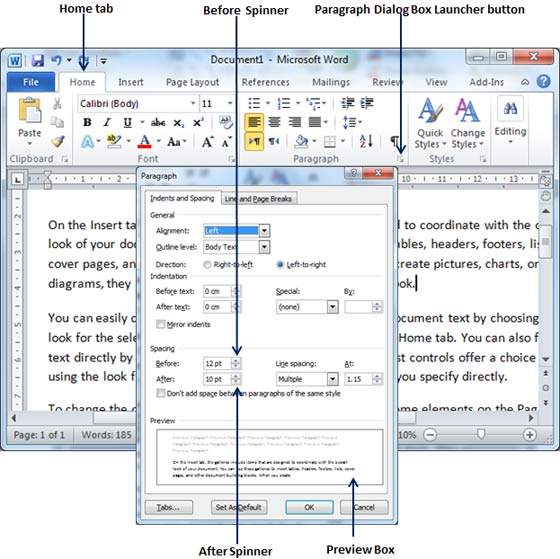
Step 1 − Click anywhere on the paragraph you want to indent right and click the Paragraph Dialog Box launcher available on the Home tab.
Step 2 − Click the Before Text spinner to set left indentation and select the First Line Option to move the left side of the first line of a paragraph inward toward the center. You can control the movement by setting the Indentation Unit. A preview box will give only the idea and not the indentation status.

Hanging Indentation
You can move the left side of the first line of a paragraph leftward, away from the center which is called the hanging indentation. Let us see the procedure to perform hanging indentation.
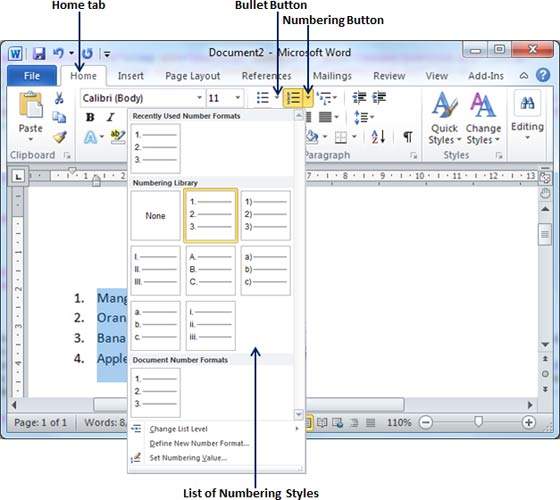
Step 1 − Click anywhere on the paragraph you want to indent right and click the Paragraph Dialog Box launcher available on the Home tab.
Step 2 − Click the Before Text spinner to set left indentation and select Hanging Option to move the left side of the first line of a paragraph leftward, away from the center. You can control the movement by setting the Indentation Unit. A preview box will give only the idea and not the indentation status.
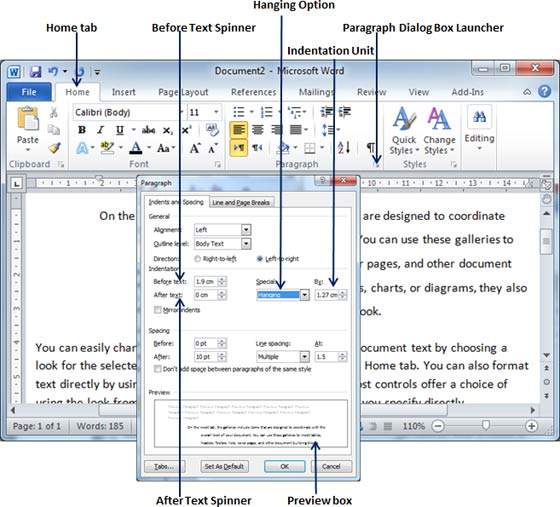
You can use the After Text spinner to set the right indentation. You can try it yourself.