Set Document Password
Once you set a password for a document then you will be able to open the document only if you know the password. If you forget your password, then there is no way to recover it and to open the document. So you need to be careful while setting a password for your important document.
The following steps will help you set a password for a Word document.
Step 1 − Open a Word document for which you want to set a password.
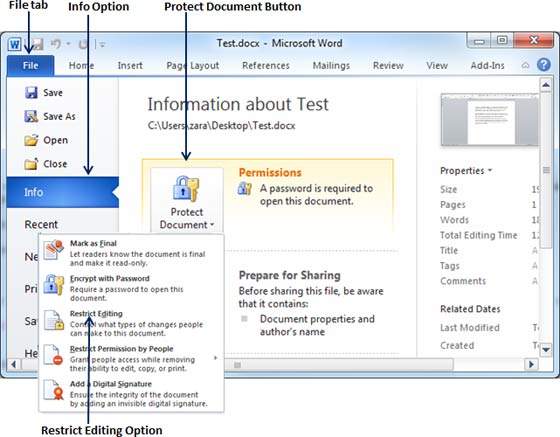
Step 2 − Click the File tab and then click the Info option and finally the Protect Document button which will display a list of options to be selected.
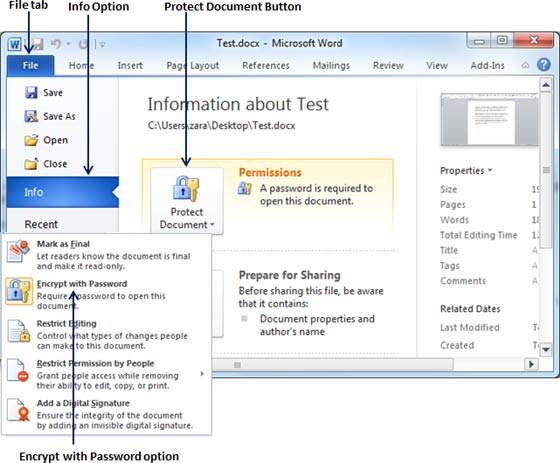
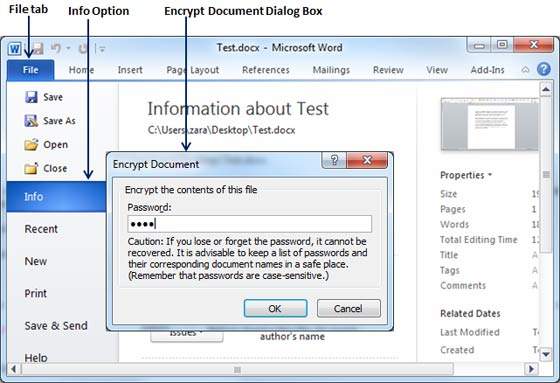
Step 3 − Select the Encrypt with Password option simply by clicking over it. This will display an Encrypt Document dialog box asking for a password to encrypt the document. The same dialog box will appear twice to enter the same password. After entering password each time, click the OK button.
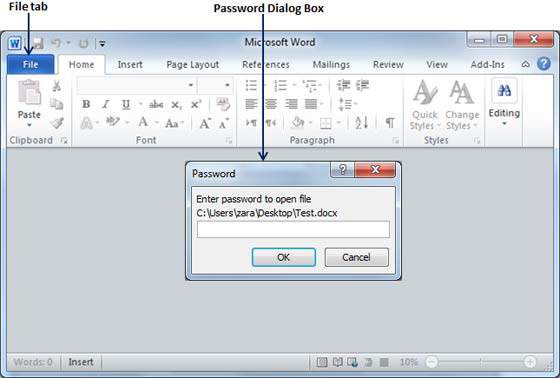
Step 4 − Save the changes, and finally you will have your document password protected. Next time when someone tries to open this document, it will ask for the password before displaying the document content, which confirms that now your document is password protected and you need password to open the document.
Remove Document Password
You can remove a document password only after opening it successfully. The following steps will help you remove password protection from your Word document.
Step 1 − Open a Word document the password of which needs to be removed. You will need the correct password to open the document.
Step 2 − Click the File tab followed by the Info option and finally the Protect Document button which will display a list of options to be selected.
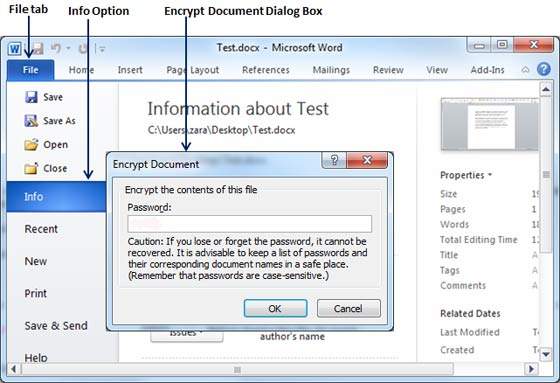
Step 3 − Select the Encrypt with Password option simply by clicking over it. This will display an Encrypt Document dialog box and password which will be in a dotted pattern. You need to remove this dotted pattern from the box and make it clear to remove the password from the document.
Now when you will open your document next time, Word will not ask you for any password because you have removed the password protection from the document.
Set Editing & Formatting Restrictions
The following steps will help you set editing restrictions in a Word document.
Step 1 − Open a Word document for which you want to set editing restrictions.
Step 2 − Click the File tab and then click the Info option and finally the Protect Document button which will display a list of options to be selected.
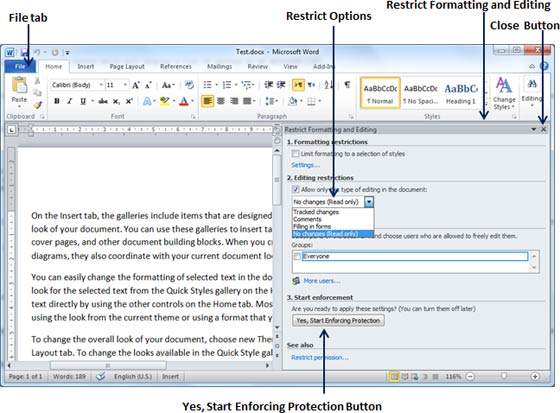
Step 3 − Select the Restrict Editing option simply by clicking over it. This will open the actual document and it will also give you the option to set editing restrictions in the Restrict Formatting and Editing area. Here you can set formatting as well as editing restrictions on the document.
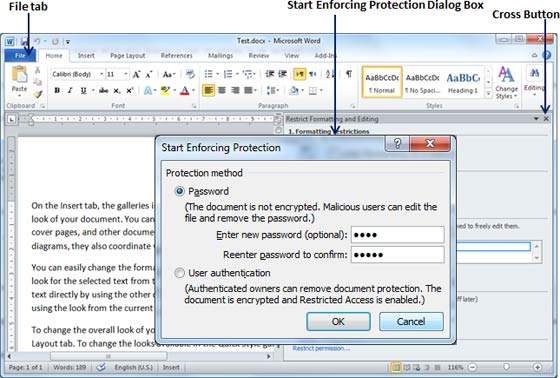
Step 4 − One you are done with your setting, click the Yes, Start Enforcing Protection button which will display a Start Enforcing Protection dialog box asking for password so that no one else can change the setting. You can enter the password or you can leave it simply blank which means there is no password setting for this protection.
Step 5 − Finally click the OK button and you will find that your document is editing (or formatting if you applied) protected.
Remove Editing & Formatting Restrictions
You can remove the editing restriction from your document using these simple steps.
Step 1 − Open a Word document for which you want to remove the editing restriction.
Step 2 − Click the File tab and then click the Info option and finally the Protect Document button; this will display a list of options to be selected.
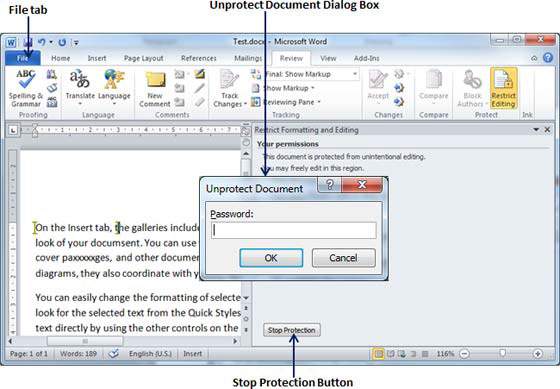
Step 3 − Select the Restrict Editing option simply by clicking over it. This will display the Restrict Formatting and Editing area as follows.
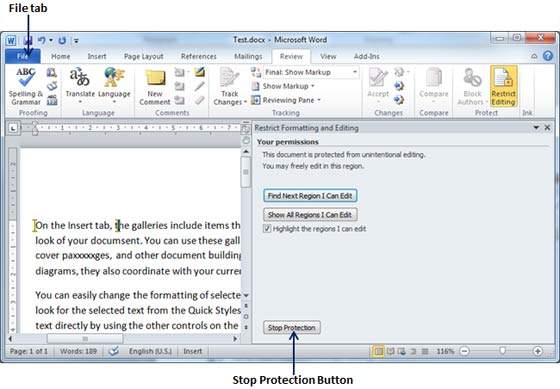
Step 4 − Now click the Stop Protection button. If you had set up a password at the time of setting the editing or formatting restrictions, then you will need the same password to remove the editing or formatting restrictions. Word will now ask for the same using the Unprotect Document Dialog box , otherwise it will simply remove the restrictions.