In this chapter, we will discuss how to set watermark in a Word document. A watermark is a picture that shows up faintly behind the text on a Word document page. When you draft a document, you can watermark the document with
Draft Copy stamp, or you can watermark a duplicate document with the
Duplicate stamp. Microsoft Word allows you to stamp with watermark using simple steps explained in this chapter.
Set Standard Watermark
The following steps will help you set standard watermark in word document. A standard watermark is the one which is already defined by words and cannot modify their font or color etc.
Step 1 − Open a word document in which you want to add a watermark.
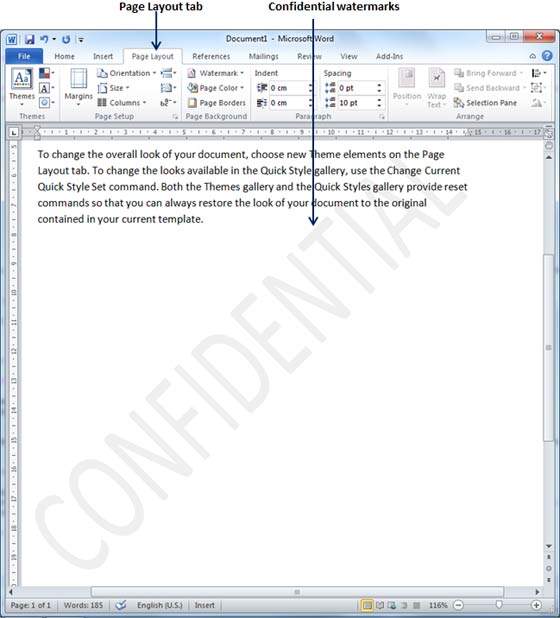
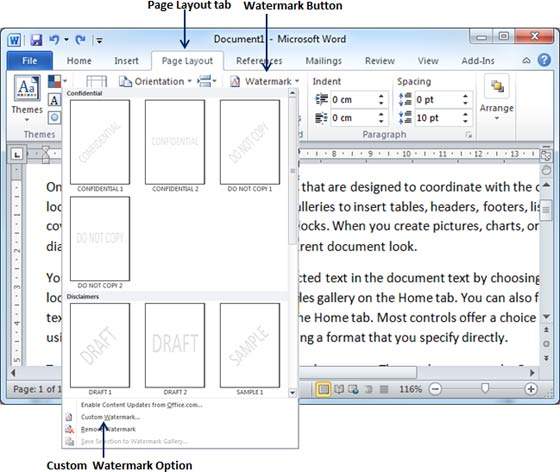
Step 2 − Click the Page Layout tab and then click the Watermark button to display a list of standard watermark options.
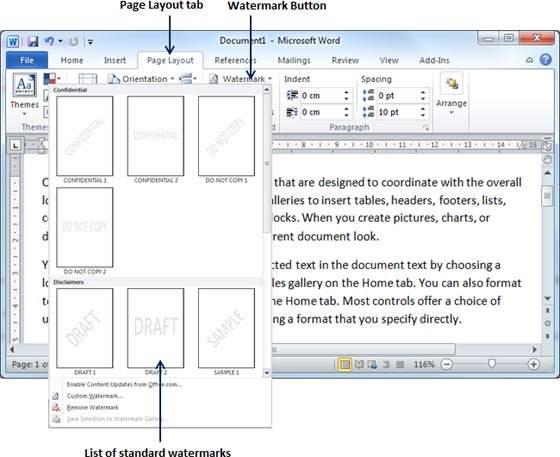
Step 3 − You can select any of the available standard watermarks by simply clicking over it. This will be applied to all the pages of the word. Assume we select the Confidential watermark.
Set Custom Watermark
The following steps will help you set custom watermark in word document. A custom watermark is the one which can be modified text and its font, color and size etc.
Step 1 − Open a Word document in which you want to add a watermark.
Step 2 − Click the Page Layout tab and then click the Watermark button to display a list of standard watermark options. At the bottom, you will find the Custom Watermark option.
Step 3 − Click over the Custom Watermark option; this will display the Printed Watermark dialog box.
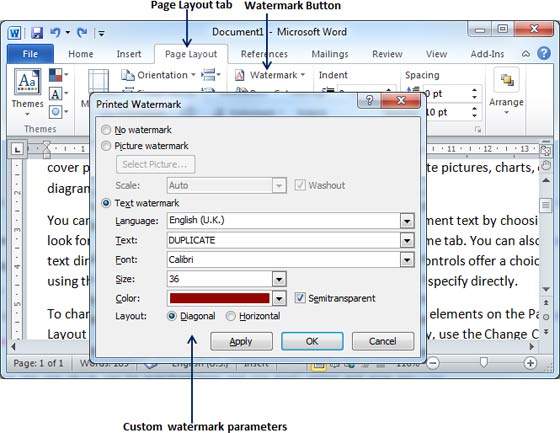
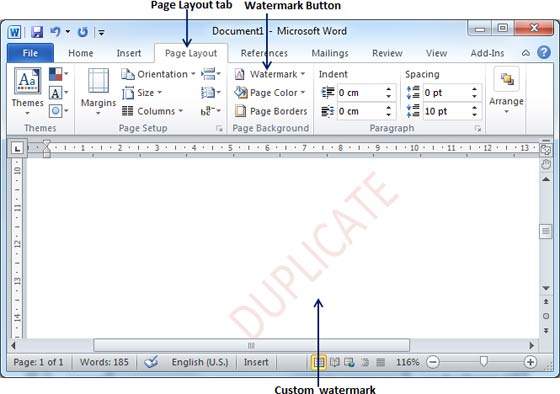
Step 4 − Now you can set a picture as watermark or you can set predefined text as watermark; you can also type your text in the Text box available at Printed Watermark dialog box. We will set text watermark as DUPLICATEand also set its font color and font size. Once all the parameters are set, click the OK button to set the parameters.
Remove Watermark
The following steps will help you remove an existing watermark from a Word document.
Step 1 − Open a Word document the watermark of which needs to be deleted.
Step 2 − Click the Page Layout tab followed by the Watermark button to display a list of standard watermark options. At the bottom, you will find the Remove Watermark option.
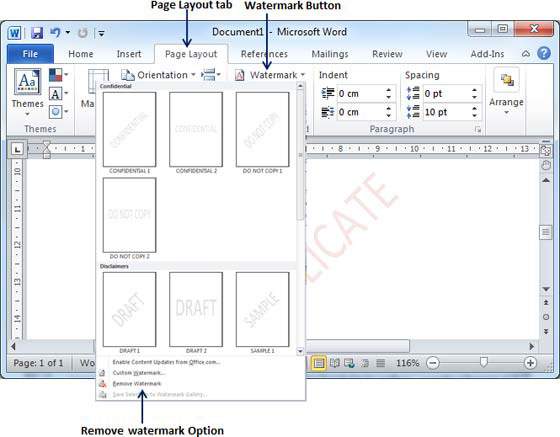
Step 3 − Click Remove Watermark option; this will delete the existing watermark from the document.