Thursday, May 25, 2023

Create Image File


Among the many file types that PowerPoint supports are a set of extensions for image files. The image file extensions supported by PowerPoint include JPEG (.jpg), GIF (.gif), TIFF (.tiff) and Bitmap (.bmp).

Given below are the steps to save a presentation as an image file.

Step 1 − Go to the Backstage view under the File tab.

Microsoft PowerPoint 2010

Step 2 − Click on Save As to open the Save As dialog.

Step 3 − Select one of the image file types from the list of supported file types.

Microsoft PowerPoint 2010

Step 4 − Add a proper name to the file and click Save.

Microsoft PowerPoint 2010

Step 5 − Microsoft PowerPoint dialog will pop up asking if you need just the selected slide or the entire presentation, make your selection.

Microsoft PowerPoint 2010

The respective image file is created in the specified location.

Microsoft PowerPoint 2010

If you selected a single image, the image file is created at the specified location. If you selected entire presentation, then PowerPoint will create a folder with same name as the presentation file at the specified location. Every slide in the presentation will be converted into individual image files and stored under this folder.

Wednesday, May 24, 2023

Create a Video File


PowerPoint allows presentations to be saved as video files that can be posted on video sharing platform like YouTube or just played on any other media.

Given below are the steps to save a presentation as a video file.

Step 1 − Go to the Backstage view under the File tab.

Microsoft PowerPoint 2010

Step 2 − Click on Save As to open the Save As dialog.

Step 3 − Select the file type as .wmv from the list of supported file types.

Microsoft PowerPoint 2010

Step 4 − Add a proper name to the file and click Save.

Microsoft PowerPoint 2010

Step 5 − The video creation is not an instant process like other file types as PowerPoint needs to create the video file. You can track the progress of video creation at the bottom of your presentation window.

Microsoft PowerPoint 2010

Step 6 − Once the creation is complete, the video file is created in the specified location.

Microsoft PowerPoint 2010

Tuesday, May 23, 2023

Create a PDF File


Although PowerPoint is used to create presentations, it supports various file types when it comes to saving the content. With a host of operating systems and Office versions available in the market, using a pdf file type can be a great way of ensuring everyone sees the same slides.

Given below are the steps to save a presentation as a pdf file.

Step 1 − Go to the Backstage view under the File tab.

Microsoft PowerPoint 2010

Step 2 − Click on Save As to open the Save As dialog.

Step 3 − Select the file type as .pdf from the list of supported file types.

Microsoft PowerPoint 2010

Step 4 − Add a proper name to the file and click Save.

Microsoft PowerPoint 2010

Step 5 − The .pdf file is created in the specified location.

Microsoft PowerPoint 2010

Monday, May 22, 2023

Add & Preview Transitions


PowerPoint supports slide transition feature which allows you to specify how should the slides transition during the slide show.

Given below are the steps to add and preview slide transitions.

Step 1 − Select the slide to which you want to apply the transition.

Step 2 − Go to the Transition Scheme under the Transitions ribbon.

Microsoft PowerPoint 2010

Step 3 − Select one of the transition schemes from the list available. PowerPoint will instantly show you a preview of the scheme. If you are not satisfied, you can pick an alternate scheme. The last selected scheme will apply to the slide.

Microsoft PowerPoint 2010

Step 4 − You can change the effects on the selected transition scheme from the Effect Options menu. Every scheme has a unique set of effect options.

Microsoft PowerPoint 2010

Step 5 − You can also modify the transition timing settings from the Timingsection.

Step 6 − To preview the slide transition, click on Preview.

Microsoft PowerPoint 2010

Friday, May 19, 2023

Add & Preview Animations


PowerPoint offers animation support which can be used effectively to add some motion in a monotonous presentation and make it more interesting. Animation can be applied to any object on the slide and the motions can the automated, timed or trigger.

The following steps will help you add and preview animations in the slide.

Step 1 − Go to the Animation ribbon and click on the Animation Pane to display the animation sidebar.

Microsoft PowerPoint 2010

Step 2 − Select one of the objects in the slide and click on the Add Animation menu option.

Microsoft PowerPoint 2010

Step 3 − Choose from one of the Animation options.

Microsoft PowerPoint 2010

  • Entrance will cause the object to appear in the screen.

  • Emphasis will cause the object to emphasis without appearing or leaving the screen.

  • Exit will cause the object to disappear from the screen.

Step 4 − Once you add the animation for an object, it will show up in the Animation pane.

Microsoft PowerPoint 2010

Step 5 − By default, all the animations are initiated by a click, but you can change this. To change the trigger, right-click on the animation object on the pane and choose an alternate trigger.

Microsoft PowerPoint 2010

  • Start On Click will cause the animation to start when you click the mouse.

  • Start With Previous will cause the animation to begin with the previous animation; if this is the first object, it will begin as soon as you reach the slide during the slide show.

  • Start After Previous will cause the animation to begin after the previous animation ends.

Step 6 − From the timing section, you can also manipulate the animation timings.

Step 7 − To preview the animation settings, just click Play on the animation pane.

Microsoft PowerPoint 2010

Thursday, May 18, 2023

Add & Format SmartArt


PowerPoint offers a unique feature called SmartArt which allows users to add text to predefined art designs. The advantage with SmartArt is that although each component of the SmartArt can be edited individually, you can also modify the SmartArt as a whole while retaining the settings on each individual component.

The following steps will help you add a SmartArt to PowerPoint.

Step 1 − Go to the Illustrations group under the Insert ribbon.

Microsoft PowerPoint 2010

Step 2 − Click on the SmartArt command to open the Choose a SmartArt Graphic dialog. You can choose the SmartArt category and pick individual SmartArt types from the list. You also get a preview and a short description of the graphic in the preview section.

Microsoft PowerPoint 2010

Step 3 − Select the SmartArt type and click OK or double-click on the SmartArt type to insert the graphic in the slide.

Step 4 − The graphic is inserted in the slide along with a text pane where you can enter/ modify the SmartArt text.

Microsoft PowerPoint 2010

Step 5 − Add the necessary details and close the text pane to complete the SmartArt insertion.

Microsoft PowerPoint 2010

The PowerPoint SmartArt formatting features have been grouped under two ribbons: Design and Format. The sections below discuss the features under each ribbon. To access these ribbons, you must select the SmartArt first.

SmartArt Design Features

We will now understand the various SmartArt design features in PowerPoint.

Microsoft PowerPoint 2010

The following table describes the various SmartArt design features in PowerPoint.

FeatureSub FeaturesDescription
Create GraphicAdd ShapeAdds another shape to the current SmartArt graphic; this also adds another bullet in the text pane.
Add BulletAdds another bullet in the text pane; this also adds another shape to the graphic.
Text PaneToggles text pane visibility.
PromoteIndents bullet to higher level in text pane - useful only in multi-level SmartArt.
DemoteIndents bullet to lower level in text pane - useful only in multi-level SmartArt.
Right to LeftHelps reverse the direction of the SmartArt flow.
Move UpMoves the bullet up in the text pane or the shape to the left in the graphics.
Move DownMoves the bullet down in the text pane or the shape to the right in the graphics.
LayoutsLayoutsAllows you to change the layout of SmartArt graphics to one from the list.
Smart StylesChange ColorsChanges the color scheme for the SmartArt graphics.
SmartArt StylesAllows you to change the SmartArt graphics styles to one of the predefined ones from the list with one click.
ResetReset GraphicRemoves all the customization done on the SmartArt graphic.
ConvertConverts SmartArt graphic to regular shapes or plain text.

SmartArt Format Features

We will now understand the various SmartArt format features in PowerPoint.

Microsoft PowerPoint 2010

The following table describes the various SmartArt format features in PowerPoint.

FeatureSub FeaturesDescription
ShapesChange ShapeChanges the selected shape in the SmartArt to one of those in the list.
LargerIncreases the size of the selected shape.
SmallerDecreases the size of the selected shape.
Shape StylesShape FillOffers different shades to be added to selected SmartArt graphics item. You can pick from solid shade, texture, image or gradient shading.
BorderOffers different border options for selected SmartArt graphics item. You can edit the border color, thickness and style.
EffectsOffers the ability to add special effects to selected SmartArt graphics item.
Word Art StylesText FillAllows you to change the color of the text within the SmartArt.
Text OutlineAllows you to add an outline to the text within the SmartArt and change the outline color, weight and style.
Text EffectsAllows you to add special effects (like reflection, shadow etc.) to the text within the SmartArt.
Quick StylesContains a list of pre-defined Word Art styles that can be applied to the selected text within the SmartArt with a single click.
ArrangeBring ForwardAllows you to move the SmartArt up by one layer or right to the top.
Send BackwardAllows you to move the SmartArt down by one layer or right to the bottom of the slide.
Selection PaneToggles the Selection and Visibility sidebar.
AlignAllows you to align the entire SmartArt with reference to the slide.
GroupAllows you to group multiple SmartArt as one group object, or split a group object into individual SmartArt.
SizeHeightAllows you to adjust the SmartArt height.
WidthAllows you to adjust the SmartArt width.

Wednesday, May 17, 2023

Add & Format Charts


Charts are an effective way of representing data. Long list of confusing numbers can instantly become trends which can be spotted when they are captured as charts. PowerPoint supports the addition and formatting of charts.

Given below are the steps to add a chart to PowerPoint.

Step 1 − Go to the Illustrations group under the Insert ribbon.

Microsoft PowerPoint 2010

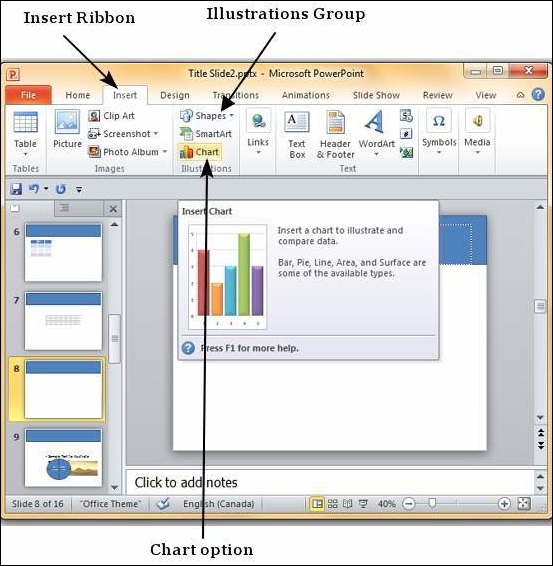
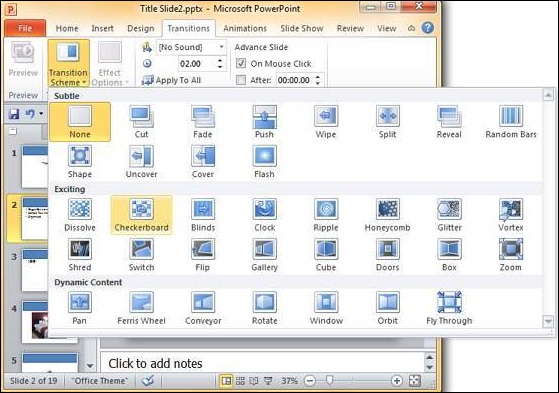
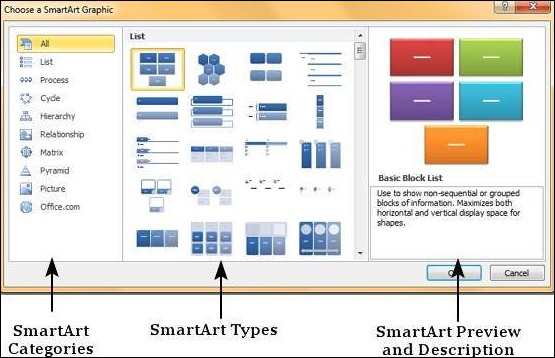
Step 2 − Click on the Chart option to open the Insert Chart dialog. You can choose the chart category and pick individual chart types from the list.

Microsoft PowerPoint 2010

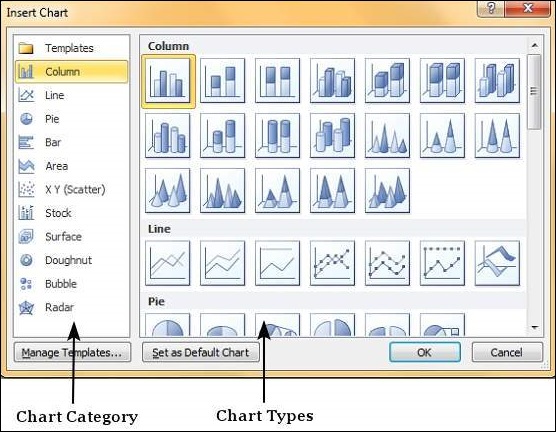
Step 3 − Select the chart type and click OK or double-click on the chart type to insert the chart in the slide.

Microsoft PowerPoint 2010

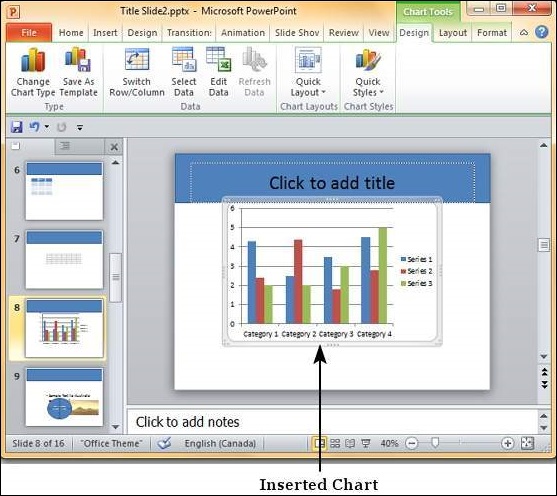
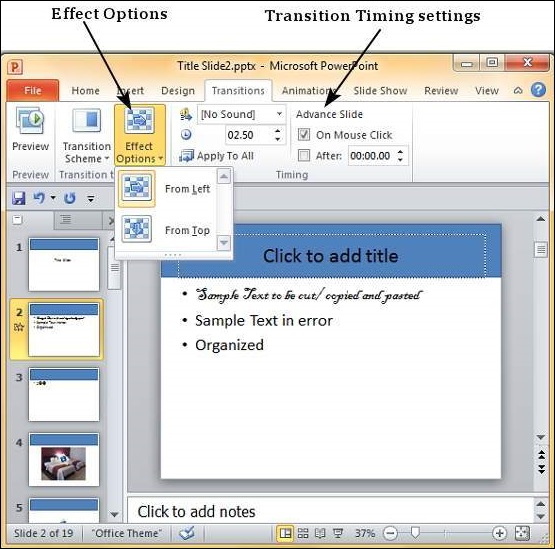
Step 4 − Along with the chart, an Excel spreadsheet is also launched. This spreadsheet is the source for your chart. You can change the category names, series names and individual values to suit your needs.

Microsoft PowerPoint 2010

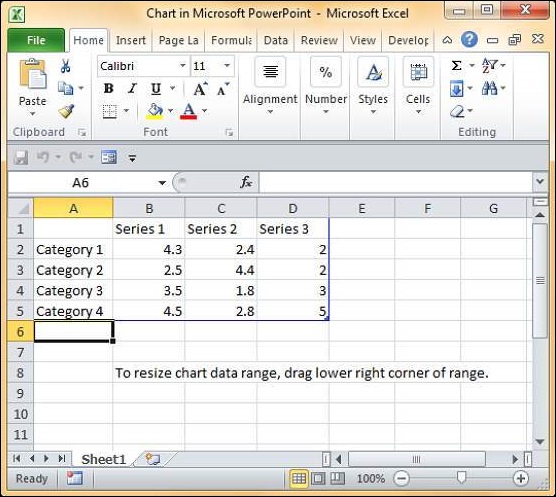
As you edit the values and the table in Excel the chart gets modified accordingly.

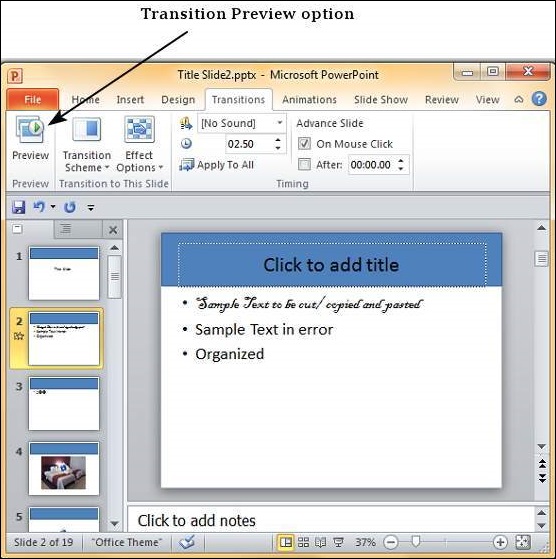
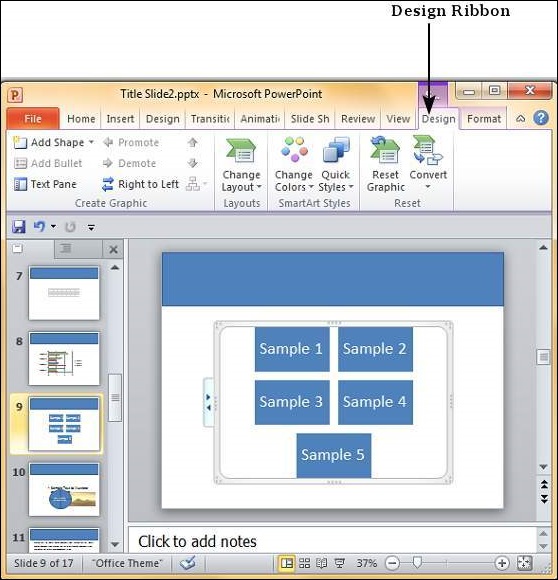
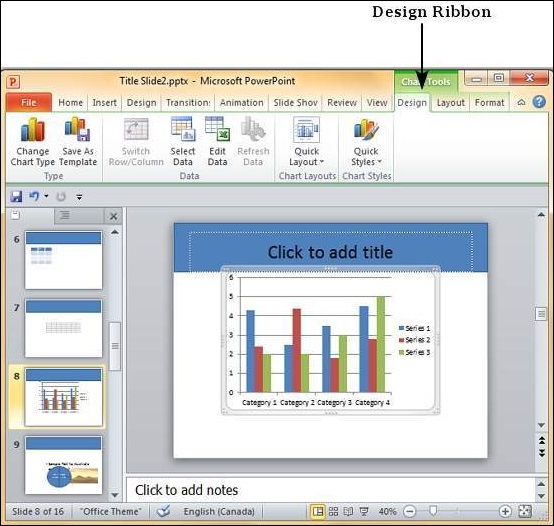
The PowerPoint chart formatting features have been grouped under three ribbons: DesignLayout and Format. The sections below discuss the features under each ribbon. To access these ribbons you must select the chart first.

Chart Design Features

We will now understand the various chart design features in PowerPoint.

Microsoft PowerPoint 2010

The table given below describes the various chart design features −

FeatureSub FeaturesDescription
TypeChange Chart TypeChanges the chart type retaining the same data.
Save As TemplateSaves current chart type as a template.
DataSwitch Row/ColumnTransposes current excel data - this is enabled when you have the source data excel sheet open.
Select DataChanges the data range covered in the chart.
Edit DataChanges the chart source data.
Refresh DataRefreshes the chart to show the latest data.
Chart LayoutsChart LayoutsOffers a list of predefined layouts which can be instantly applied to current chart with a single click.
Chart StylesChart StylesOffers a list of predefined styles which can be instantly applied to current chart with a single click.

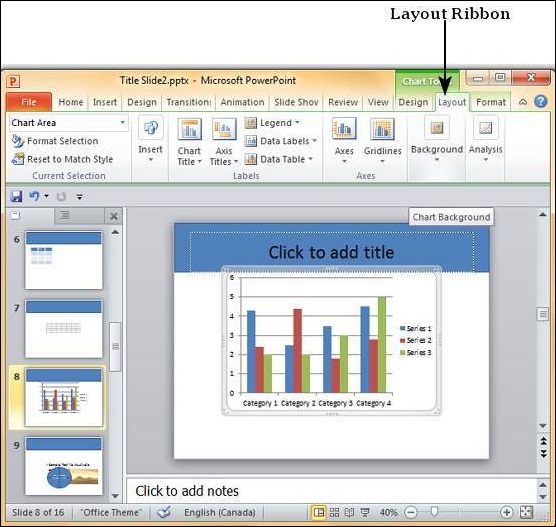
Chart Layout Features

We will now understand the various chart layout features in PowerPoint.

Microsoft PowerPoint 2010

The following table describes the various chart layout features in PowerPoint.

FeatureSub FeaturesDescription
Current SelectionDrop downShows the currently selected chart element.
Format SelectionShows the selection format dialog to update the selection.
Reset to Match StyleDiscards all the chart customizations and matches the chart with the overall presentation theme.
InsertPictureSuperimposes an image on top of the chart.
ShapeAdds a shape to the slide.
Text BoxAdds a text box to the slide.
LabelsChart TitleDefines the visibility, position and style of the chart title.
Axis TitlesDefines the visibility, position and style of the axis titles.
LegendDefines the visibility and position of the chart legend.
Data LabelsDefines the visibility and position of the data labels.
Data TableDefines the visibility, position and format of the data table.
AxesAxesDefines the position and scale of axes.
GridlinesDefines the visibility and scale of axes.
BackgroundPlot AreaToggles chart plot area - available only for 2D charts.
Chart WallToggles the chart wall - available only for 3D charts.
Chart FloorToggles the chart floor - available only for 3D charts.
3-D RotationToggles the chart 3D rotation- available only for 3D charts.

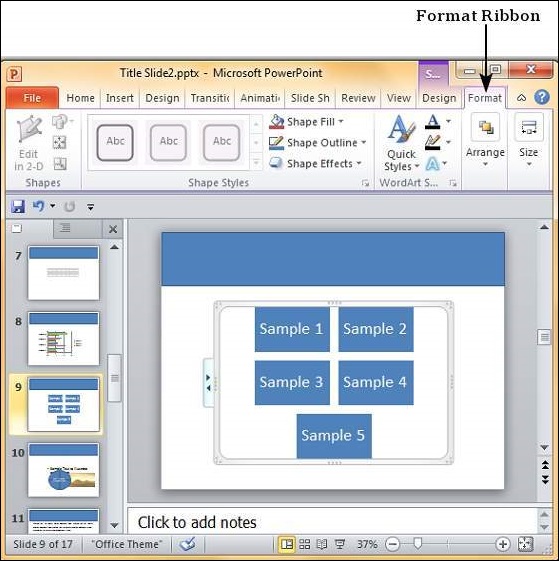
Chart Format Features

We will now understand the various chart format features in PowerPoint.

Microsoft PowerPoint 2010

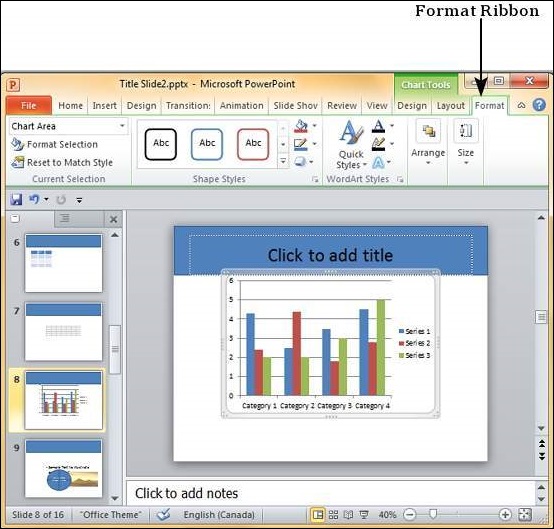
The following table describes the various chart format features in PowerPoint.

FeatureSub FeaturesDescription
Current SelectionDrop downShows the currently selected chart element.
Format SelectionShows the selection format dialog to update the selection.
Reset to Match StyleDiscards all the chart customizations and matches the chart with the overall presentation theme.
Shape StylesShape FillOffers different shades to be added to selected chart series item. You can pick from solid shade, texture, image or gradient shading.
BorderOffers different border options for selected chart series item. You can edit the border color, thickness and style.
EffectsOffers the ability to add special effects to selected chart series item.
Word Art StylesText FillAllows you to change the color of the text within the chart.
Text OutlineAllows you to add an outline to the text within the chart and change the outline color, weight and style.
Text EffectsAllows you to add special effects (like reflection, shadow etc.) to the text within the chart.
Quick StylesContains a list of pre-defined Word Art styles that can be applied to the selected text within the chart with a single click.
ArrangeBring ForwardAllows you to move the chart up by one layer or right to the top.
Send BackwardAllows you to move the chart down by one layer or right to the bottom of the slide.
Selection PaneToggles the Selection and Visibility sidebar.
AlignAllows you to align the entire chart with reference to the slide.
GroupAllows you to group multiple charts as one group object, or split a group object into individual charts.
SizeHeightAllows you to adjust the chart height.
WidthAllows you to adjust the chart width.

Data Link Layer

In the OSI model, the data link layer is a 4 th  layer from the top and 2 nd  layer from the bottom. The communication channel t...