Tuesday, May 16, 2023

Add & Format Tables


One of the most powerful data representation techniques is the use of tables. Table allows information to be segregated making it easy to read. PowerPoint has features that let you add tables in slides and also format them to enhance their visual effects. What's more, these tables are also compatible with Microsoft Excel, so you can basically take a spreadsheet or a section of a spreadsheet and paste it into a slide as a table.

The following steps will help you add a table in PowerPoint.

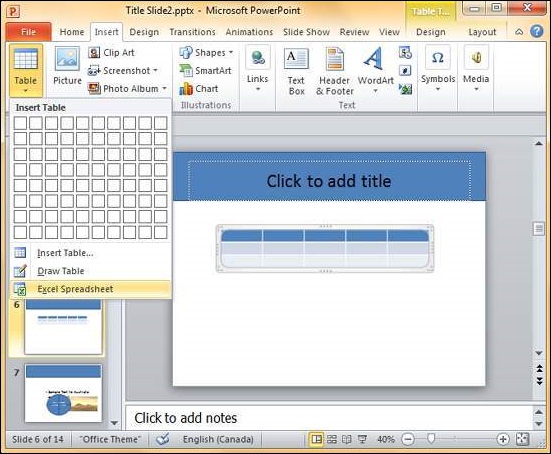
Step 1 − Go to the Tables group under the Insert ribbon.

Microsoft PowerPoint 2010

Step 2 − Click on the dropdown and select your table dimension from the matrix.

Microsoft PowerPoint 2010

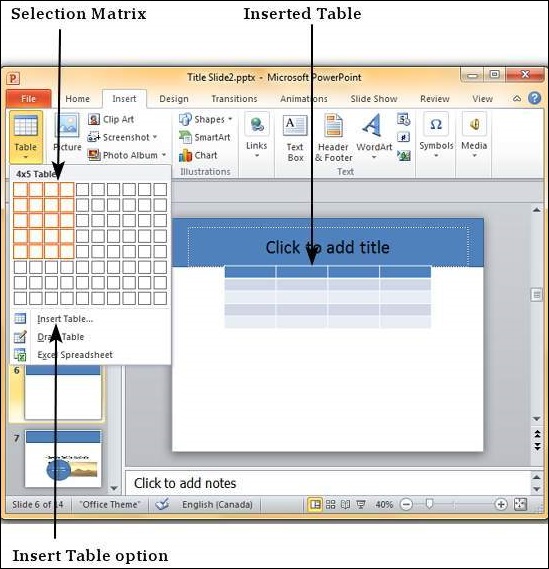
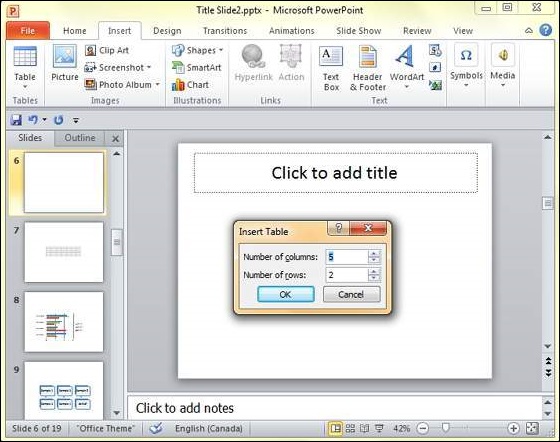
Step 3 − If you require more than 10 columns or 8 rows click on "Insert Table" to open the Insert Table dialog where you can specify the column and row count.

Microsoft PowerPoint 2010

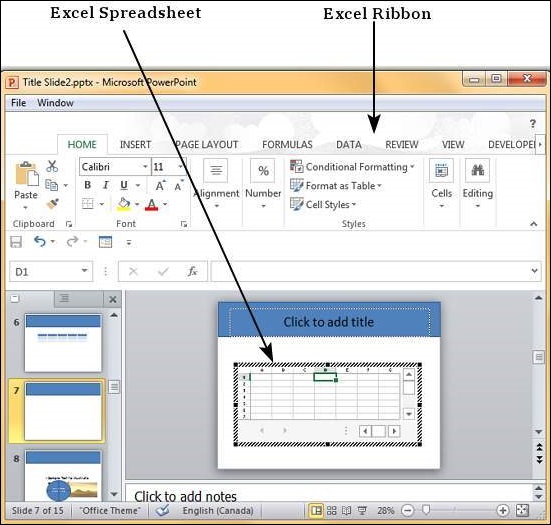
PowerPoint table is a simple table that does not support the mathematical features of an Excel spreadsheet. If you want to carry out some calculations, you can insert an Excel spreadsheet instead of a regular table.

Microsoft PowerPoint 2010

This will insert the spreadsheet in the slide and as long as the spreadsheet is selected, the ribbon at the top will be changed to an Excel ribbon instead of a PowerPoint one.

Microsoft PowerPoint 2010

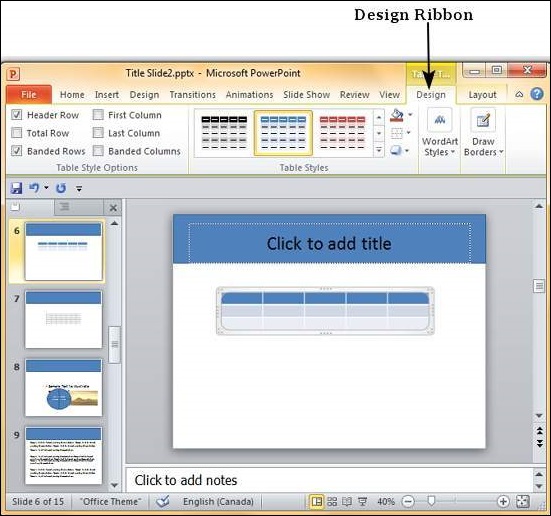
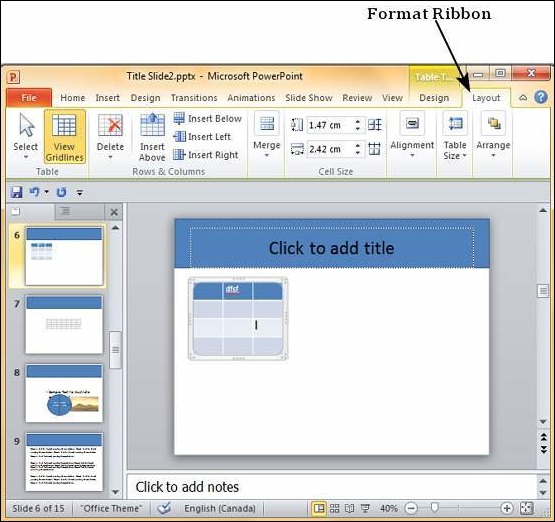
The PowerPoint table formatting features have been grouped under two ribbons: Design and Format. The sections below discuss the features under each ribbon. To access these ribbons, you must select the table first.

Table Design Features

We will now understand the table design features in PowerPoint.

Microsoft PowerPoint 2010

The following table shows the different table design features −

FeatureSub FeaturesDescription
Table Style OptionsHeader RowAdds a different shade to the first row to distinguish it.
Total RowAdds a different shade to the last row to distinguish it.
Banded RowsShades alternate rows in the table with the same color.
First ColumnAdds a different shade to the first column to distinguish it.
Last ColumnAdds a different shade to the last row to distinguish it.
Banded ColumnsShades alternate columns in the table with the same color.
Table StylesShadingOffers different shades to be added to selected table/ row/ column/ cell. You can pick from solid shade, texture, image or gradient shading.
BorderOffers different border options for the table. You can edit the border color, thickness and style
EffectsOffers the ability to create table shadow or reflection. You can also create bevels for individual cells.
Word Art StylesText FillAllows you to change the color of the text within the table.
Text OutlineAllows you to add an outline to the text within the table and change the outline color, weight and style.
Text EffectsAllows you to add special effects (like reflection, shadow etc.) to the text within the table.
Quick StylesContains a list of pre-defined Word Art styles that can be applied to the selected text within the table with a single click.
Draw BordersPen StyleDefines the style of the table border when you draw it.
Pen WeightDefines the thickness of the table border when you draw it.
Pen ColorDefines the color of the table border when you draw it.
Draw TableAllows you to append new rows, columns, cells to existing table, split existing rows, columns or cells and draw brand new tables.
EraserAllows you to delete table borders and merge cells, rows or columns.

Table Format Features

We will now understand the various table format features in PowerPoint.

Microsoft PowerPoint 2010

The following table shows the various table format features −

FeatureSub FeaturesDescription
TableSelectAllows you to select the entire table or the row(s) or column(s) depending on the position of your cursor.
View GridlinesToggles the gridline display within the table.
Rows & ColumnsDeleteAllows you to delete selected row(s) or column(s) or the entire table.
Insert AboveInserts a row above the row where the cursor is currently. If you haven't placed the cursor within the table, it adds a new row at the top of the table.
Insert BelowInserts a row below the row where the cursor is currently. If you haven't placed the cursor within the table, it adds a new row at the bottom of the table.
Insert LeftInserts a column to the left of the column where the cursor is currently. If you haven't placed the cursor within the table, it adds a new column to the left of the table.
Insert RightInserts a column to the right of the column where the cursor is currently. If you haven't placed the cursor within the table, it adds a new column to the right of the table.
MergeMergeAllows you to merge cells, rows or columns. This is enabled only if you have selected more than one cell, row or column.
Split CellsAllows you to specify the number of rows and columns into which the current section of cell(s) need to be split.
Cell SizeHeight/ WidthDefines the height and width of the selected cell. Usually if you change these aspects for a single cell, the change affects the entire row or column too.
Distribute RowsEqualizes the height of all the rows to fit the current table height.
Distribute ColumnsEqualizes the width of all the columns to fit the current table width.
AlignmentHorizontal AlignmentAllows you to align the selected text to the left, right or center of the cell.
Vertical AlignmentAllows you to align the selected text to the top, bottom or middle of the cell.
Text DirectionAllows you to change the direction of the selected text within the cells.
Cell MarginsAllows you to define the margins within the cell.
Table SizeHeightAllows you to adjust the table height - it retains the relative heights of the individual rows while changing the overall table height.
WidthAllows you to adjust the table width - it retains the relative widths of the individual columns while changing the overall table width.
Lock Aspect RatioChecking this box will ensure the ratio between the table height and width is maintained when one of these is changed.
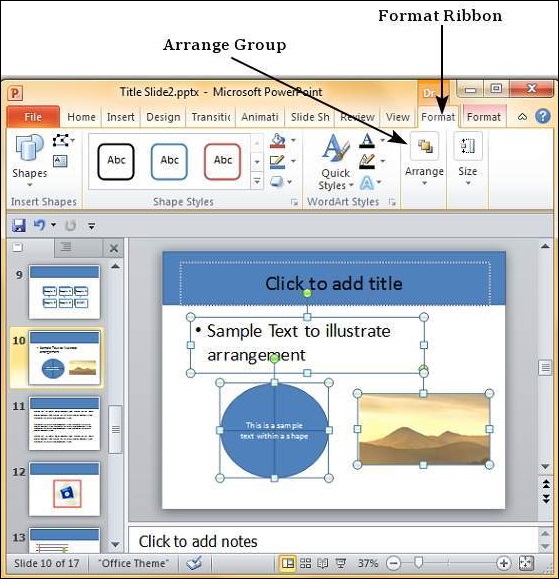
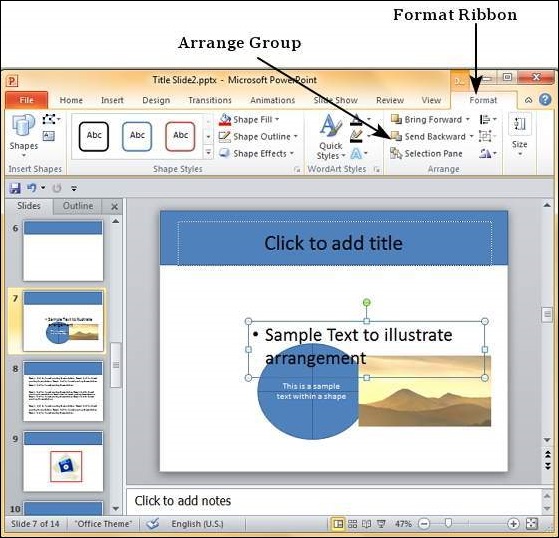
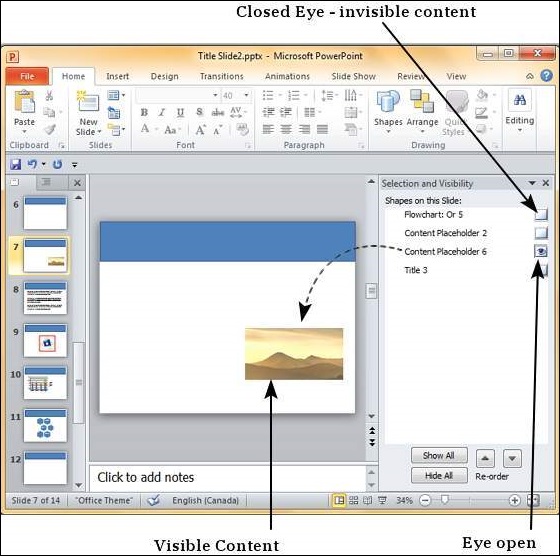
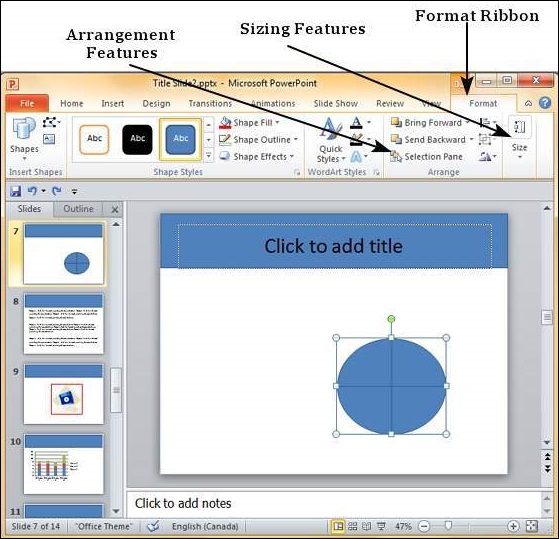
ArrangeBring ForwardAllows you to move the table up by one layer or right to the top.
Send BackwardAllows you to move the table down by one layer or right to the bottom of the slide.
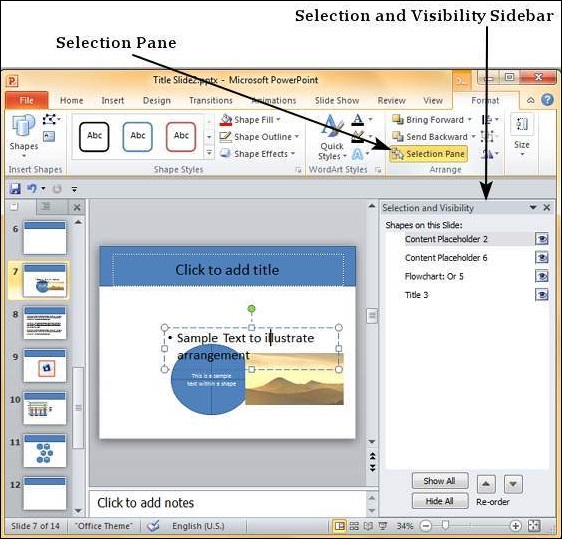
Selection PaneToggles the Selection and Visibility sidebar.
AlignAllows you to align the entire table with reference to the slide.

Sunday, May 14, 2023

Adding Audio & Video


PowerPoint supports multimedia in the slides. You can add audio or video clips to the slides which can be played during the presentation.

The following steps will help you add audio or video file to the slides.

Step 1 − Go to the Media group under the Insert ribbon

Microsoft PowerPoint 2010

Step 2 − To insert video file select Video as media type and Video from Fileto insert a video from your computer or hard drive.

Microsoft PowerPoint 2010

Step 3 − In the Insert Video dialog, browse for a video file and click Insert.

Microsoft PowerPoint 2010

Step 4 − You will now see that a Video file is added to the slide.

Microsoft PowerPoint 2010

Step 5 − To insert audio file select Audio as media type and Audio from Fileto insert an Audio from your computer or hard drive.

Microsoft PowerPoint 2010

Step 6 − In the Insert Audio dialog, browse for an audio file and click Insert.

Microsoft PowerPoint 2010

Step 7 − You will now see that an Audio file is added to the slide.

Microsoft PowerPoint 2010

Friday, May 12, 2023

Group/Ungroup Objects


While working with PowerPoint, you might need to carry out a set of actions on a bunch of objects. PowerPoint allows you to group objects within a slide and apply the same action on all the objects simultaneously. This feature in PowerPoint is called grouping.

The following steps will help you group and ungroup objects −

Step 1 − Select a set of shapes or objects together. To select the objects, press the Ctrl key and select each object individually. If the objects are together, you can also click and drag the cursor to select them; however with the click and drag everything that falls within the selected area will be selected.

Microsoft PowerPoint 2010

Step 2 − Go to the Arrange Group under the Format ribbon.

Microsoft PowerPoint 2010

Step 3 − Click on Group under the Group menu item - this will group the objects and shapes into a single object.

Microsoft PowerPoint 2010

Step 4 − Apply the common changes you want to make to these objects.

Microsoft PowerPoint 2010

Step 5 − Even though the objects are grouped, you can still edit them individually if need be.

Microsoft PowerPoint 2010

Step 6 − If you want to edit the shapes or objects individually, go back to the Group menu item and select Ungroup.

Microsoft PowerPoint 2010

Step 7 − After making changes, if you want to regroup the objects as per original grouping, you select one of the objects and use the Regroup option under the Group menu.

Microsoft PowerPoint 2010

Thursday, May 11, 2023

Arrange Shapes/Images


PowerPoint supports multiple content types and invariably different contents coexist in a slide. While it is ideal to have each content standout separately, there are times when you cannot do that or when overlapping of content is desirable. In such cases, it is important that you can determine which content stays on top of which one.

PowerPoint has arrangement features to help achieve this goal. While working with arrangement features, you must think of each content as a separate layer and that these layers are laid over one another. To arrange the content, you must basically play with these layers.

The following steps will help you arrange content in a presentation slide.

Step 1 − Select one of the contents and go the Arrange group under the Format ribbon.

Microsoft PowerPoint 2010

Step 2 − Click on the Selection Pane to open the Selection and Visibilitysidebar.

Microsoft PowerPoint 2010

Step 3 − Select one of the rows in the sidebar to highlight the corresponding content in the slide.

Microsoft PowerPoint 2010

Step 4 − Use the reordering arrows in the sidebar to move the content layer up or down.

Microsoft PowerPoint 2010

Step 5 − Click on the eye next to each content in the sidebar to toggle its visibility on the slide.

Microsoft PowerPoint 2010

Instead of using the Selection Pane option, you can also right-click on the content to move it up or down. When you right-click, besides moving the layers by one step at a time using Bring Forward or Send Backward, you can also move the content directly to the top or bottom using Bring to Frontor Send to Back respectively.

Microsoft PowerPoint 2010

Wednesday, May 10, 2023

Adding Text to Shapes


One of the great aspects of PowerPoint is that you can treat the shapes as text boxes too. This becomes useful when you want to type some text within a shape and ensure the text does not overflow the boundaries of the shape. By being able to enter text within the shape, PowerPoint will ensure the text stays contained and you do not have to worry about fixing it.

The following steps will help you add text to the shapes in PowerPoint.

Step 1 − Right-click on the shape to which you want to add the text and select the Edit Text option.

Microsoft PowerPoint 2010

Step 2 − Start typing the text into the shape. Once you are done, click the cursor anywhere outside the shape.

Microsoft PowerPoint 2010

An alternative way of adding text to shape is to select the shape and start typing directly. Once you have the text within the shape you can format the text using the font related features available in PowerPoint.

Tuesday, May 9, 2023

Format Added Shapes


PowerPoint offers formatting features for shapes along the same lines as pictures. This consistency in the features makes it easy for people to grasp the functionality and also makes PowerPoint very versatile. The shape formatting features in PowerPoint can be accessed from the Format ribbon once the shape is selected. The formatting features are grouped under the Arrangeand Size section in the Format ribbon.

Microsoft PowerPoint 2010

Shape Arrangement Features

The table given below describes the various shape arrangement features available in PowerPoint.

S.NoFeature & Description
1

Bring Forward

Moves the shape layer up. Bring Forward moves the shape up by one layer, Bring to Front makes the shape layer the topmost.

2

Send Backward

Moves the shape layer down. Send Backward moves the shape down by one layer, Send to Back makes the shape layer the bottommost.

3

Selection Pane

This opens up the Selection Pane sidebar where you get a better idea of the layers and can work with arrangements better.

4

Align

Aligns the shape with various references in the slide.

5

Group

Allows multiple shapes to be grouped together to create on single object or ungroup them to split them into individual shapes.

6

Rotate

Rotates shape by a specific angle.

Shape Sizing Features

The table given below describes various shape sizing features available in PowerPoint.

S.NoFeature & Description
1

Shape Height/ Width

Used to change the height and width of the shape. When you edit these parameters from the ribbon, the aspect ratio is always maintained

Monday, May 8, 2023

Editing Added Shapes


Just like images and pictures, PowerPoint also supports editing of shapes inserted in the presentation. The shape editing features in PowerPoint can be accessed from the Format ribbon once the shape is selected. The editing features are grouped under the Insert Shapes and the Shape Styles section in the Format ribbon.

Microsoft PowerPoint 2010

Insert Shape Features

The table below describes various insert shape features available in PowerPoint.

S.NoFeature & Description
1

Shape List

Adds another shape to the slide.

2

Edit Shape

Replaces the shape completely, or use the edit points to change the existing shape.

3

Text Box

Inserts a text box anywhere in the slide.

Shape Styles Features

The table below describes various shape style features available in PowerPoint.

S.NoFeature & Description
1

Shape Fill

Selects the shape fill color and style. You can add a single solid color from the palette, or a picture, gradient or texture.

2

Shape Outline

Selects the shape border color, thickness and style.

3

Shape Effects

Adds special effects to the shape like reflection, 3D rotation, bevel, shadow, etc.

4

Predefined Styles

These are a combination of the style features that can be applied to the shape with a single click.

Editing Microsoft Word document

Open the file that you want to edit. Choose from the following tasks:   Task Steps Edit text Click the Edit tab. Select the text...