Thursday, July 27, 2023

Special Symbols in Excel


If you want to insert some symbols or special characters that are not found on the keyboard in that case you need to use the Symbols option.

Using Symbols

Go to Insert » Symbols » Symbol to view available symbols. You can see many symbols available there like Pi, alpha, beta, etc.

Select the symbol you want to add and click insert to use the symbol.

Symbols

Using Special Characters

Go to Insert » Symbols » Special Characters to view the available special characters. You can see many special characters available there like Copyright, Registered etc.

Select the special character you want to add and click insert, to use the special character.

Special Characters

Wednesday, July 26, 2023

Zoom In/Out in Excel


Zoom Slider

By default, everything on screen is displayed at 100% in MS Excel. You can change the zoom percentage from 10% (tiny) to 400% (huge). Zooming doesn’t change the font size, so it has no effect on the printed output.

You can view the zoom slider at the right bottom of the workbook as shown below.

Zoom Slider

Zoom In

You can zoom in the workbook by moving the slider to the right. It will change the only view of the workbook. You can have maximum of 400% zoom in. See the below screen-shot.

Zoom In

Zoom Out

You can zoom out the workbook by moving the slider to the left. It will change the only view of the workbook. You can have maximum of 10% zoom in. See the below screen-shot.

Zoom Out

Tuesday, July 25, 2023

Spell Check in Excel


MS Excel provides a feature of Word Processing program called Spelling check. We can get rid of the spelling mistakes with the help of spelling check feature.

Spell Check Basis

Let us see how to access the spell check.

  • To access the spell checker, Choose Review ➪ Spelling or press F7.

  • To check the spelling in just a particular range, select the rangebefore you activate the spell checker.

  • If the spell checker finds any words it does not recognize as correct, it displays the Spelling dialogue with suggested options.

Spell Check Dialog

Exploring Options

Let us see the various options available in spell check dialogue.

  • Ignore Once − Ignores the word and continues the spell check.

  • Ignore All − Ignores the word and all subsequent occurrences of it.

  • Add to Dictionary − Adds the word to the dictionary.

  • Change − Changes the word to the selected word in the Suggestions list.

  • Change All − Changes the word to the selected word in the Suggestions list and changes all subsequent occurrences of it without asking.

  • AutoCorrect − Adds the misspelled word and its correct spelling (which you select from the list) to the AutoCorrect list.

Monday, July 24, 2023

Find & Replace in Excel


MS Excel provides Find & Replace option for finding text within the sheet.

Find and Replace Dialogue

Let us see how to access the Find & Replace Dialogue.

To access the Find & Replace, Choose Home → Find & Select → Find or press Control + F Key. See the image below.

Find option in MS Excel

You can see the Find and Replace dialogue as below.

Find Tab in Excel

You can replace the found text with the new text in the Replace tab.

Replace Tab in Excel

Exploring Options

Now, let us see the various options available under the Find dialogue.

  • Within − Specifying the search should be in Sheet or workbook.

  • Search By − Specifying the internal search method by rows or by columns.

  • Look In − If you want to find text in formula as well, then select this option.

  • Match Case − If you want to match the case like lower case or upper case of words, then check this option.

  • Match Entire Cell Content − If you want the exact match of the word with cell, then check this option.

Various Find options in Excel

Friday, July 21, 2023

Copy & Paste in Excel


MS Excel provides copy paste option in different ways. The simplest method of copy paste is as below.

Copy Paste

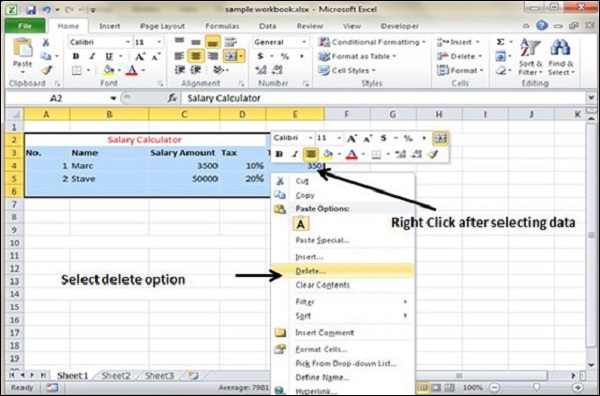
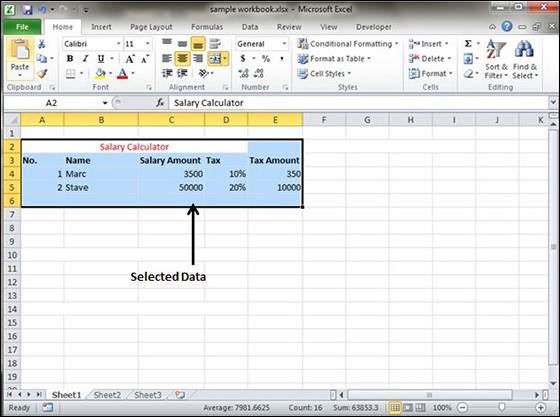
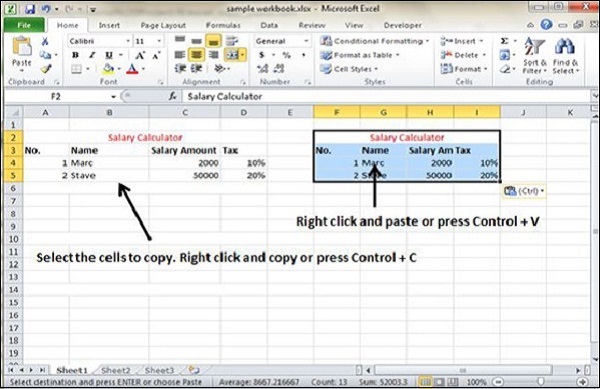
  • To copy and paste, just select the cells you want to copy. Choose copy option after right click or press Control + C.

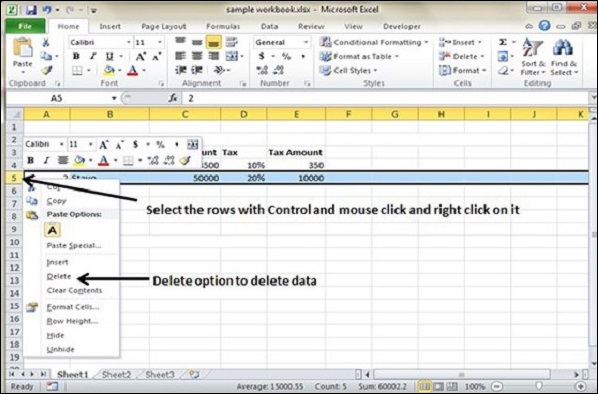
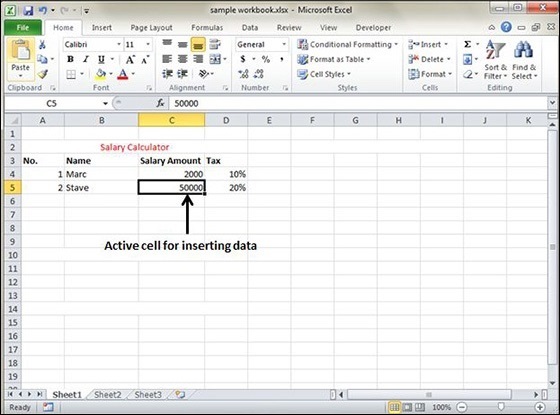
  • Select the cell where you need to paste this copied content. Right click and select paste option or press Control + V.

Simple Copy Paste

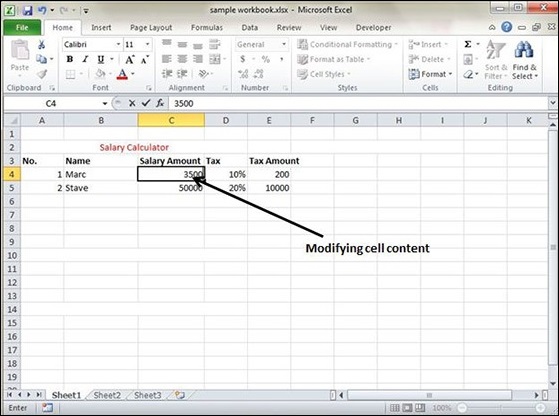
In this case, MS Excel will copy everything such as values, formulas, Formats, Comments and validation. MS Excel will overwrite the content with paste. If you want to undo this, press Control + Z from the keyboard.

Copy Paste using Office Clipboard

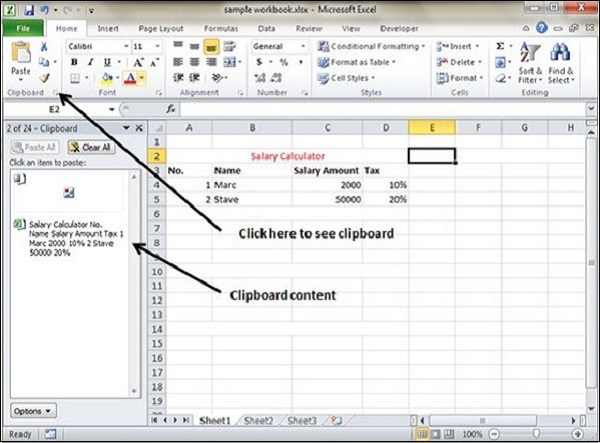
When you copy data in MS Excel, it puts the copied content in Windows and Office Clipboard. You can view the clipboard content by Home → Clipboard. View the clipboard content. Select the cell where you need to paste. Click on paste, to paste the content.

View clipboard content

Copy Paste in Special way

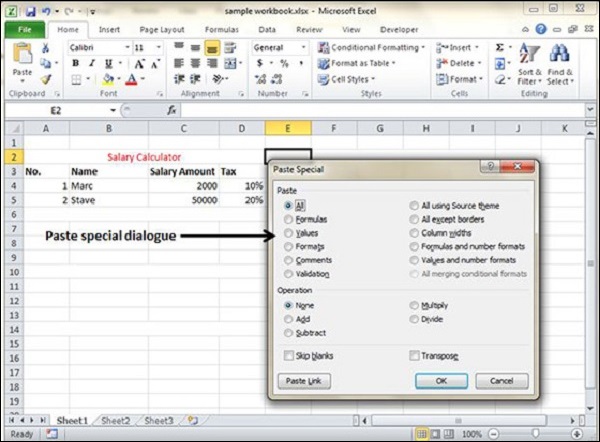
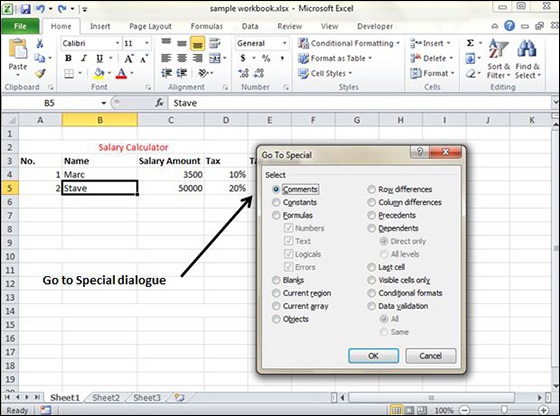
You may not want to copy everything in some cases. For example, you want to copy only Values or you want to copy only the formatting of cells. Select the paste special option as shown below.

View clipboard content

Below are the various options available in paste special.

  • All − Pastes the cell’s contents, formats, and data validation from the Windows Clipboard.

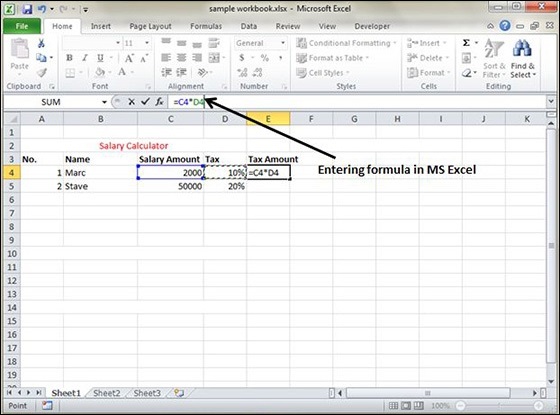
  • Formulas − Pastes formulas, but not formatting.

  • Values − Pastes only values not the formulas.

  • Formats − Pastes only the formatting of the source range.

  • Comments − Pastes the comments with the respective cells.

  • Validation − Pastes validation applied in the cells.

  • All using source theme − Pastes formulas, and all formatting.

  • All except borders − Pastes everything except borders that appear in the source range.

  • Column Width − Pastes formulas, and also duplicates the column width of the copied cells.

  • Formulas & Number Formats − Pastes formulas and number formatting only.

  • Values & Number Formats − Pastes the results of formulas, plus the number.

  • Merge Conditional Formatting − This icon is displayed only when the copied cells contain conditional formatting. When clicked, it merges the copied conditional formatting with any conditional formatting in the destination range.

  • Transpose − Changes the orientation of the copied range. Rows become columns, and columns become rows. Any formulas in the copied range are adjusted so that they work properly when transposed.

View clipboard content

Thursday, July 20, 2023

Rows & Columns in Excel


Row and Column Basics

MS Excel is in tabular format consisting of rows and columns.

  • Row runs horizontally while Column runs vertically.

  • Each row is identified by row number, which runs vertically at the left side of the sheet.

  • Each column is identified by column header, which runs horizontally at the top of the sheet.

For MS Excel 2010, Row numbers ranges from 1 to 1048576; in total 1048576 rows, and Columns ranges from A to XFD; in total 16384 columns.

Navigation with Rows and Columns

Let us see how to move to the last row or the last column.

  • You can go to the last row by clicking Control + Down Navigation arrow.

  • You can go to the last column by clicking Control + Right Navigation arrow.

Rows and Columns in MS Excel

Cell Introduction

The intersection of rows and columns is called cell.

Cell is identified with Combination of column header and row number.

For example − A1, A2.

Cell Introduction

Wednesday, July 19, 2023

Move Data in Excel


Let us see how we can Move Data with MS Excel.

Step 1 − Select the data you want to Move. Right Click and Select the cut option.

Cut Selected data with Right Click

Step 2 − Select the first cell where you want to move the data. Right click on it and paste the data. You can see the data is moved now.

Moved Data

Tuesday, July 18, 2023

Delete Data in Excel


MS Excel provides various ways of deleting data in the sheet. Let us see those ways.

Delete with Mouse

Select the data you want to delete. Right Click on the sheet. Select the delete option, to delete the data.

Delete Selected Data with mouse

Delete with Delete Key

Select the data you want to delete. Press on the Delete Button from the keyboard, it will delete the data.

Selective Delete for Rows

Select the rows, which you want to delete with Mouse click + Control Key.Then right click to show the various options. Select the Delete option to delete the selected rows.

Selective delete of rows

Monday, July 17, 2023

Select Data in Excel


MS Excel provides various ways of selecting data in the sheet. Let us see those ways.

Select with Mouse

Drag the mouse over the data you want to select. It will select those cells as shown below.

Select Data with mouse

Select with Special

If you want to select specific region, select any cell in that region. Pressing F5will show the below dialogue box.

Clicking F5 on Cell

Click on Special button to see the below dialogue box. Select current region from the radio buttons. Click on ok to see the current region selected.

Selecting Current region

As you can see in the below screen, the data is selected for the current region.

See Selected Data

Friday, July 14, 2023

Insert Data in Excel


In MS Excel, there are 1048576*16384 cells. MS Excel cell can have Text, Numeric value or formulas. An MS Excel cell can have maximum of 32000 characters.

Inserting Data

For inserting data in MS Excel, just activate the cell type text or number and press enter or Navigation keys.

Insert Data

Inserting Formula

For inserting formula in MS Excel go to the formula bar, enter the formula and then press enter or navigation key. See the screen-shot below to understand it.

Insert Formula

Modifying Cell Content

For modifying the cell content just activate the cell, enter a new value and then press enter or navigation key to see the changes. See the screen-shot below to understand it.

Modify Cell Content

Thursday, July 13, 2023

Open Workbook in Excel


Let us see how to open workbook from excel in the below mentioned steps.

Step 1 − Click the File Menu as shown below. You can see the Open optionin File Menu.

There are two more columns Recent workbooks and Recent places, where you can see the recently opened workbooks and the recent places from where workbooks are opened.

File Menu

Step 2 − Clicking the Open Option will open the browse dialog as shown below. Browse the directory and find the file you need to open.

Open Dialog

Step 3 − Once you select the workbook your workbook will be opened as below −

File Menu

Wednesday, July 12, 2023

Close Workbook in Excel


Close Workbook

Here are the steps to close a workbook.

Step 1 − Click the Close Button as shown below.

Close Sheet

You'll see a confirmation message to save the workbook.

Close Sheet2

Step 2 − Press the Save Button to save the workbook as we did in MS Excel - Save Workbook chapter.

Now your worksheet will get closed.

Tuesday, July 11, 2023

Delete Worksheet in Excel


Delete Worksheet

Here is the step to delete a worksheet.

Step − Right Click the Sheet Name and select the Delete option.

Delete Sheet

Sheet will get deleted if it is empty, otherwise you'll see a confirmation message.

Delete Sheet2

Press the Delete Button.

Now your worksheet will get deleted.

Monday, July 10, 2023

Hiding Worksheet in Excel


Hiding Worksheet

Here is the step to hide a worksheet.

Step − Right Click the Sheet Name and select the Hide option. Sheet will get hidden.

Hide Sheet

Unhiding Worksheet

Here are the steps to unhide a worksheet.

Step 1 − Right Click on any Sheet Name and select the Unhide... option.

Unhide Sheet

Step 2 − Select Sheet Name to unhide in Unhide dialog to unhide the sheet.

Press the Ok Button.

Now you will have your hidden sheet back.

Data Link Layer

In the OSI model, the data link layer is a 4 th  layer from the top and 2 nd  layer from the bottom. The communication channel t...