Wednesday, May 3, 2023

Format Added Pictures


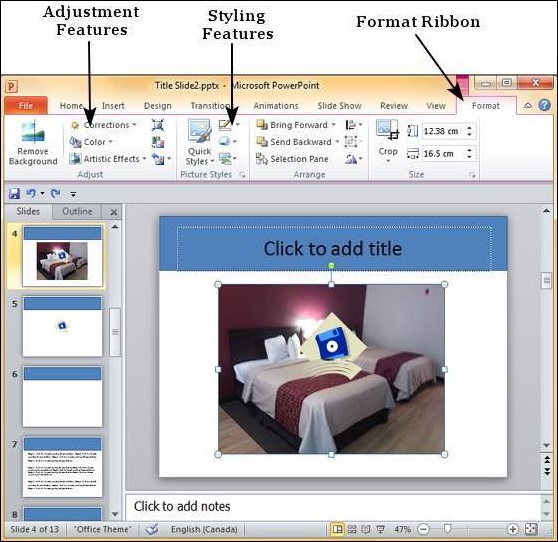
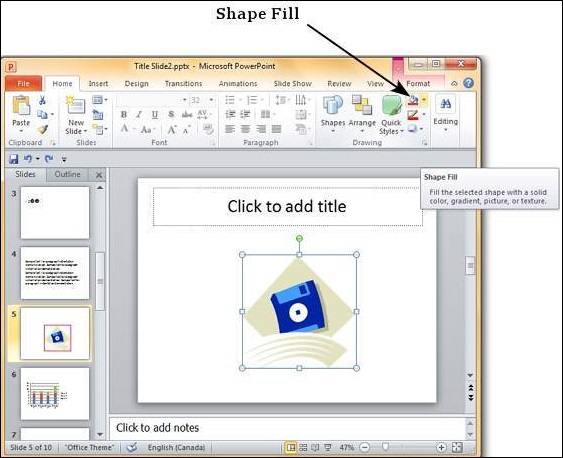
PowerPoint offers many image formatting features that can help shape the image to suit your needs. The picture formatting features in PowerPoint can be accessed from the Format ribbon once the picture is selected. The formatting features are grouped under the Arrange and Size section in the Formatribbon.

Microsoft PowerPoint 2010

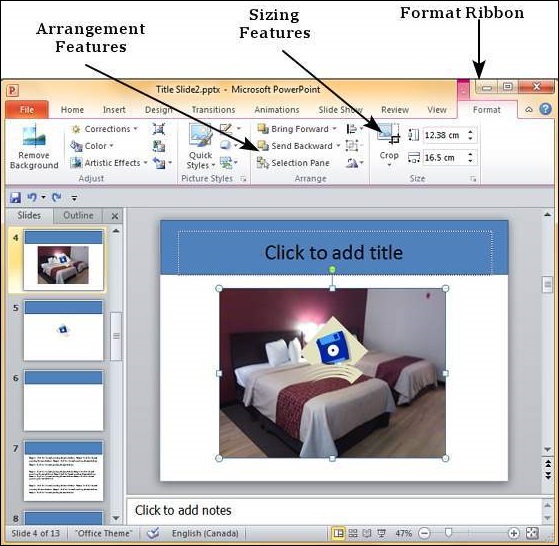
Picture Arrangement Features

The following table describes various picture arrangement features available in PowerPoint.

S.NoFeature & Description
1

Bring Forward

Moves the picture layer up. Bring Forward moves the picture up by one layer, Bring to Front makes the picture layer the topmost

2

Send Backward

Moves the picture layer down. Send Backward moves the picture down by one layer, Send to Back makes the picture layer the bottommost

3

Selection Pane

This opens up the Selection Pane sidebar where you get a better idea of the layers and can work with arrangements better.

4

Align

Aligns the picture with various references in the slide.

5

Group

Allows multiple images to be grouped together to create on single object or ungroup them to split them into individual pictures.

6

Rotate

Rotate picture by a specific angle.

Picture Sizing Features

The following table describes various picture sizing features available in PowerPoint.

S.NoFeature & Description
1

Crop

Allows you to crop the image. The cropping can be freehand, based on aspect ratio or any of the predefined shapes.

2

Shape Height/ Width

Used to change the height and width of the image. When you edit these parameters from the ribbon, the aspect ratio is always maintained.

Tuesday, May 2, 2023

Editing Added Pictures


PowerPoint supports images or pictures as content and offers some standard image editing features. The picture editing features in PowerPoint can be accessed from the Format ribbon once the picture is selected. The editing features are grouped under the Adjust and Picture Styles section in the Format ribbon.

Microsoft PowerPoint 2010

Image Adjustments

The following table describes various picture adjustment features available in PowerPoint.

S.NoFeature & Description
1

Remove Background

Automatically removes the unwanted sections in the image. This is similar to the magic tool in some of the other photo editing programs. You can click on different regions on the image to define the area to be removed.

2

Correction

Allows you to change the brightness and contrast on the image and also change the image sharpness.

3

Color

Allows you to change the color on the image by changing the saturation or tone. You can also make the image monochromatic based on different hues to match the theme of your presentation.

4

Artistic Effects

Adds artistic effects to the image like plastic wrap, glowing edges, etc.

5

Compress Picture

This can change the image resolution to manage the file size.

6

Change Picture

Replaces the current picture with a different one.

7

Reset Picture

Removes all the adjustments done on the image.

Picture Styles

The following table describes various picture style features available in PowerPoint.

S.NoFeature & Description
1

Picture Border

Manages the picture border - color, weight and style.

2

Picture Effects

Adds effects to the picture like reflection, shadow, etc.

3

Convert to SmartArt Graphic

Transforms the picture into the selected SmartArt.

4

Quick Styles

Pre-defined styles with different picture borders and effects.

Monday, May 1, 2023

Add Pictures to Slide


PowerPoint supports multiple content types including images or pictures. With regards to pictures PowerPoint classifies them into two categories −

  • Picture − Images and photos that are available on your computer or hard drive
  • Clip Art − Online picture collection that you can search from the clip art sidebar

Although their sources are different, both these types can be added and edited in similar fashion. Given below are the steps to add picture to a slide.

Step 1 − Go to the Images group in the Insert ribbon.

Microsoft PowerPoint 2010

Step 2 − Click on Picture to open the Insert Picture dialog and add a picture to the slide.

Step 3 − In this dialog, you have three sections: to the left corner, you have folders that can be browsed, the section in the center shows the subfolders and files in the selected folder and to the right, you can have a preview of the selected image.

Microsoft PowerPoint 2010

Step 4 − Select the image you want and click Open to add the picture to the slide.

Microsoft PowerPoint 2010

Step 5 − To add online pictures, click on Clip Art and search for keywords in the Clip Art sidebar.

Microsoft PowerPoint 2010

Step 6 − Once you have the clipart you want to use, double-click on the image to add it to the slide.

Microsoft PowerPoint 2010

Friday, April 28, 2023

Save Design Template


One of the best features of PowerPoint is that you can create slide masters and then save them as templates to be reused later. There are different aspects of a design which can be created and saved to ensure you can reuse the hard work you spent on creating the first copy.

Given below are the steps to save design templates.

Step 1 − Create a new design template from the Slide Master view. Depending on your needs, this template can have different colors, images, logos or symbols included in the master slide and the layout templates.

Microsoft PowerPoint 2010

Step 2 − Go to the Edit Theme group under the Slide Master ribbon.

Microsoft PowerPoint 2010

Step 3 − Navigate to Edit Themes > Themes > Save Current Theme…

Microsoft PowerPoint 2010

Step 4 − In the Save Current Theme dialog, enter the Theme name and click Save.

Microsoft PowerPoint 2010

Step 5 − This template is now saved and available on your PowerPoint design template view to be applied to any presentation.

Microsoft PowerPoint 2010

Thursday, April 27, 2023

Using Slide Master


Slide master is simple way of applying changes to the entire slide. Every presentation has at least one slide master, but you can have more than one. Using features like copy/ paste and format painting you can make changes to different sections within the presentation to make them look similar, however, if you want to use a theme and background throughout the slide, using the slide master is a simpler and more graceful way of approaching it.

Given below are the steps to customize your slide master.

Step 1 − Go to the Master Views group under the View ribbon.

Microsoft PowerPoint 2010

Step 2 − Click on Slide Master to open the Slide Master Ribbon. The top most slide in the left sidebar is the Master slide. All the slides within this master template will follow the settings you add on this master slide.

Microsoft PowerPoint 2010

Step 3 − You can make changes to the master slide in terms of the theme, design, font properties, position and size of the title and other content using the remaining ribbons which are still accessible.

Step 4 − While PowerPoint provides some default slide layouts, you can create your own layouts by clicking on the "Insert Layout" in the Edit Master section of the Slide Master ribbon.

Microsoft PowerPoint 2010

Step 5 − You can add content placeholders to the slide layouts using the "Insert Placeholder" in the Master Layout group under the Slide Master ribbon. Under the Placeholder dropdown, you can either create a generic content placeholder or specify the kind of content you want in that placeholder.

Microsoft PowerPoint 2010

Step 6 − You can apply different themes, background and page setup settings to all the slides from the master slide

Step 7 − You can also customize individual slide layouts to be different from the master slide using the menu options available with the layouts.

Microsoft PowerPoint 2010

Tuesday, April 25, 2023

Apply Formatting


One of the most powerful tools in Microsoft Office is the application of formatting feature. This feature basically lets you define the right format once and apply the same to a series of objects in the rest of the presentation or any other file. While working with large presentations or just working on slides for a long time, if you ever need to make a change in the style and want it applied across multiple content this is the tool to use.

The following are the steps to apply formatting to your presentation −

Step 1 − Select the content you want to copy the formatting from.

Step 2 − Go to the Clipboard group under the Home ribbon.

Microsoft PowerPoint 2010

Step 3 − Click on the Format Painter icon.

Microsoft PowerPoint 2010

Step 4 − Select the content you want to format.

Microsoft PowerPoint 2010

Here are some key aspects about the Format Painter −

  • If you click on the Format Painter icon just once, the formatting will be copied just once.

  • If you click on the Format Painter icon twice quickly, you can copy the formatting multiple times.

  • If you want to copy just the text formatting and not the paragraph features, ensure that you select just the sample text and not the entire paragraph.

  • If you want to copy paragraph and font formatting, you must select the entire paragraph.

Microsoft PowerPoint 2010

Borders and Shades


One can change the borders and shading for most of the content in PowerPoint 2010. Let’s see how it is done

Applying Borders

The following are the steps that will help you apply borders in your presentation.

Step 1 − Select the object (text box, image, chart, picture, etc.) to which you want to apply the border.

Step 2 − Go to the Drawing group under the Home ribbon.

Microsoft PowerPoint 2010

Step 3 − Click on the Shape Outline to choose the border settings.

Microsoft PowerPoint 2010

Step 4 − Use the color palette to choose the border color. You can choose More Outline Colors to get access to additional color choices

Step 5 − Use the Weight dropdown to define the thickness of the border.

Step 6 − Use the Dashes option to define the border style.

Microsoft PowerPoint 2010

Applying Shades

The following steps will help you apply shades to your presentation.

Step 1 − Select the object (text box, shape, chart, etc.) to which you want to apply the shades.

Step 2 − Go to the Drawing group under the Home ribbon.

Microsoft PowerPoint 2010

Step 3 − Click on the Shape Fill to choose the shade settings.

Microsoft PowerPoint 2010

Step 4 − Use the color palette to choose the shade color. You can choose More Outline Colors to get access to a choice of colors.

Step 5 − Use the Picture to add a picture as the background rather than a color.

Step 6 − Use the Gradient option to add color gradient in the background. You can use the pre-defined gradients or click on "More Gradients…" to customize the shading with gradient colors.

Step 7 − Use the Texture option to add a pre-defined texture instead of a color shade.

Microsoft PowerPoint 2010

Data Link Layer

In the OSI model, the data link layer is a 4 th  layer from the top and 2 nd  layer from the bottom. The communication channel t...