Tuesday, November 7, 2023

Installation of a video card


Let's review the sequence of steps for replacing your video card with a new one:

  1. Unplug the power supply and disconnect the power cable.

nothing

  1. Disconnect all wires on the backside of the computer case.

nothing

  1. Remove the cover of the system unit. To do this, unscrew the screws on the case's back that fasten the cover and slide it off. If you have a fan installed in the system unit cover, disconnect the fan cable from the connector.
  2. Before you start to disassemble computer components, take a couple of pictures so that when you reassemble, you don't forget to connect anything.
  3. Disconnect the video card power cables (if your video card supports auxiliary power). Unscrew the fixing screws. Press the latch on the PCI-e connector and pull it out to remove the video card.
  4. nothing

    nothing

    1. Install a new video card.

    nothing

    1. Fix the video card.

    nothing

    1. Connect the auxiliary power cables of the video card (if there are any).

    nothing

    1. Replace the system unit cover and secure it.

Installation of two video cards

Description

Nvidia's technology for combining two or more graphic processors is called SLI (scalable link interface). The analogue from AMD company is called CrossFireX. These technologies allow you to increase the video performance.

You need two graphics cards of the same series and the same Nvidia model in order to install SLI linking in the system.

In case of AMD, you can merge absolutely any models. But combining video cards must be built on the same architecture. Manufacturers provide information about product compatibility on the official website of the company. 

An important point. The adapters' own video memory never adds up. This means that if each video card has 2 GB of RAM and 4 GB of RAM, the result will only be 2 GB.

Preparing for installation

To build an SLI and CrossfireX based system you will need:

  1. A high-performance CPU capable of running two graphics adapters simultaneously. Otherwise, you will not be able to increase performance.
  2. A motherboard with two or more PCI-express x16 slots which support this technology.
  3. A powerful power supply. It is almost doubling power requirements. 
  4. Video cards that support this technology. 
  5. A bridge that connects video cards.

AMD allows to merge cards without using this bridge, but in this case, the loss in performance will be about 15-20%

Installation

  1. Install the video cards in the PCI Express slots.
  2. Secure the graphics cards with the locking screw.
  3. Connect the power supply to both devices using the PCI-E plugs.
  4. Connect the video cards with a bridge.

nothing

  1. Close the computer case and turn on the computer.
  2. If NVIDIA graphics adapters are used, you need to enter the Configure SLI menu and check Auto-Select and Maximize 3D performance. And in the case of Crossfire technology, the parameters will be changed automatically.

Manufacturers recommend buying one good video card rather than installing a combination of several video cards with average parameters


Monday, November 6, 2023

Applying thermal paste


nothing

Overview

The silicon crystal of every processor gets hot and releases thermal energy during active computations. The crystal's heat is absorbed by the metal protective cover of the processor. Further, the heat flows to the heat sink, which disperses the heat to the environment.

There are microscopic air gaps between the processor cover and the heat sink plate. Air does not convey heat well.  Due to its elasticity, thermal paste occupies the empty spaces, thus displacing the air from there. Thermal paste has a higher thermal conductivity than air, resulting in better heat transfer from the processor to the heatsink.

All thermal paste will eventually dry out. This can create micro-cracks that trap air and reduce the effectiveness of thermal paste. Therefore, it is necessary to replace the thermal paste periodically.

Replacement interval

If you run highly demanding programs (computer games) on your computer every day, the producers recommend changing the thermal paste on average once every 2 years:

  • in gaming laptops: once a year;
  • in office PCs: once every four years.

If you frequently use a computer that does not run highly demanding programs, you should monitor the temperature of the processor cores. If you have high core temperatures with a low CPU load, it is recommended to change the thermal paste.

You should also change the thermal paste if your laptop or computer has been subjected to vibration or bump for any reason. Vibration causes the heatsink to move and creates an air gap.

Viscosity

Thermal paste is made by mixing the main ingredient with a binding agent. The basic component of a thermal paste is a combination of several metal elements, metal oxides, nitrides (aluminum, tungsten, silver, zinc, graphite, etc.) ground to a powder. A binding agent transforms the powder into a paste. Among the binding agents used are silicone, mineral, synthetic oils, and special low-vapor mixtures.

Each thermal paste has a specific viscosity. The viscosity of the thermal paste depends on:

  • Quality of the thermal conductive components grinded;
  • The ratio of the amount of thermal conductive component to the amount of low-vaporizable oil;
  • Quality of blending the main ingredient with the binding agent.

Types of thermal pastes

nothing

Thermal pastes based on liquid metals

These thermal pastes are the most effective and expensive. This type of thermal paste is based on rare liquid metals, such as gallium. The heat transfer efficiency of liquid thermal pastes is many times greater than other types of thermal pastes.

More liquid thermal pastes are more effective than thicker thermal pastes at filling the cavities between the CPU lid and the cooler heat sink plate due to their thin thermal conductive layer and high ductility.

Liquid metal-based thermal pastes are used in cooling systems of high-loaded processors in video game consoles and computers.

Metal-based thermal pastes

Liquid metal-based thermal pastes are cheaper. The main ingredient of this thermal paste is metal particles (silver or aluminum), which conduct heat well. They also have high thermal conductivity and are used in cooling systems for high-load processors in video game consoles and computers.

Carbon-based Thermal Pastes

They are universal thermal pastes in terms of price-performance ratio. This kind of thermal pastes has small fibers of carbon or diamond powder in their composition. The thermal conductivity of these thermal pastes is relatively high.

Ceramic-based thermal pastes

These thermal pastes are inexpensive and have low thermal conductivity. These thermal pastes contain metal oxides. They are used in cooling systems of computer processors that do not require intensive cooling.

How to apply thermal paste

Some of the optimal designs are as follows:

The following patterns are applied to processors:

nothing

  1. Dot-shaped thermal paste pattern
  2. Cross-shaped thermal paste pattern
  3. Aligning thermal paste over the surface of the processor cover with a plastic card or special scraper.

Apply a pattern with two curved lines along their long plane on large and elongated processors.


nothing

Using these methods of applying, the thermal paste covers the entire surface of the processor's protective cover, and there is no excess if it is applied gently enough.

Thermal paste should be applied in a very thin layer. Here is a picture of the wrong way to apply thermal paste on the left and the right way to apply thermal paste on the right.

nothing

1 - Cooling radiator

2 - Thermal paste

3 - CPU heatsink cover

As shown in the picture on the right, the thermal paste must occupy the rough surfaces of the CPU cover and heatsink.

The picture on the left shows the thermal paste applied thickly which slows down the heat transfer from the CPU to the heatsink.

Applying thermal paste

  1. Before applying thermal paste, make sure that the thermal paste is not out of date.
  2. Carefully remove the cooling radiator.

nothing

  1. Before applying a new thermal paste, eliminate any residue from the old thermal paste.

nothing

  1. Degrease the surface.
  2. Apply the thermal paste in one of the patterns (1,2,3) to the CPU protective cover. Use the thinnest layer of thermal paste possible to ensure effective heat dissipation. Do not apply thermal paste to the cooling heatsink.

nothing

  1. If you do not have a CPU protective cover, apply thermal paste directly to the processor chip.
  2. After applying thermal paste, you should immediately install the cooling heatsink on the CPU's protective cover. It is necessary to prevent the thermal paste from stiffening.
  3. nothing

    1. The clamping force of the heatsink to the processor must be equal on all sides. It is necessary to tighten the cooling heatsink screws equally hard to distribute the thermal paste evenly.

Thursday, November 2, 2023

CPU installation


nothing

In this article, we will discuss the important points about how to install the CPU in the slot of the socket. For a detailed step-by-step description of how to disassemble the system unit, remove the motherboard, and remove the CPU, check out the article about installing the motherboard.

The CPU is a fragile part of the system and can be easily damaged. It is important not to bend the pins of the processor when installing it. The CPU's pins can get bent under the influence of your fingers.

The processor must be taken carefully by its edges.

Removing the CPU

Every motherboard manufacturer has a specific socket.

To remove the AMD processor, you have to pull out the socket lever. The pins inside the socket shift and release the processor.

nothing

To remove the Intel processor, press the socket lever, push the lever to the side and then lift it with the pressure frame.

Installation

The CPU will not be physically installed into the socket if it is not positioned properly. CPU keys can help to prevent incorrect installation.

nothing

The triangle keys are located on the corner of the CPU and the corner of the socket. They must be aligned for proper installation.

nothing

In addition to these keys, there are special indentations on the CPU board that ensure that the CPU cannot be installed incorrectly in the socket.

Wednesday, November 1, 2023

Installation of the motherboard


Compatibility

Before you purchase a motherboard, it is important to read the specifications of the computer case. The specifications will tell you which case and motherboard size (Standard ATX, Mini-ITX, Micro-ATX, and others) are compatible. Please refer to the computer case manufacturer's official website for technical specifications.

Replacing the motherboard

You will need:

nothing

  1. Flathead screwdriver and Phillips head screwdriver
  2. Clean tissue and alcohol to clean components (or alcohol wipes)
  3. Thermal paste
  4. Hexes (maybe)

Sequence of steps to replace the motherboard

In case you are replacing the motherboard and not installing a new one, you need to:

  1. Turn off the power supply and disconnect the power lead.
  2. Disconnect all wires on the backside of the computer case.
  3. nothing

    1. Remove the cover of the system unit. To do this, unscrew the screws on the back of the case and slide the cover to the left. It is easy to detach from the case. If you have a glass cover, it is screwed on the edges with four screws. If you have a fan installed in the system unit cover, you will need to remove it.

    nothing

    1. It is recommended that you take a picture of all the connectors before disassembling the computer components to not forget to connect anything when reassembling.
    2. Disconnect the wires that power the video card (if your video card supports the optional power supply). Unscrew the fixing screws. Press the latch on the PCI-e connector and pull it out to remove the video card.
    3. Disconnect the motherboard power and fan power, HDD power, USB power, and others.
    4. nothing

      1. If necessary, remove the power supply unit. To do this, unscrew the locking screws on the back of the system unit. Removing the power supply to replace the motherboard is not always necessary.

      nothing

      1. Disconnect the memory cards. To do this, simultaneously press the locking plastic tabs on the sides of the card.

      nothing

      1. To remove the motherboard from the case, you need to unscrew the fixing screws. Different motherboards have a different number of screws.

      nothing

      nothing

      1. Remove the heatsink from the CPU. To do this, unscrew the fixing screws or unclip the fixing clips. The mounting of the heatsinks differs from manufacturer to manufacturer.
      2. Remove the CPU. To do this, bend the metal catch, open the cover, and gently pull out the CPU.
      3. nothing

        1. After removing the heatsink, you must clean the old thermal paste from the joint between the heatsink and CPU. Then, when installing the motherboard, apply the thermal paste onto the CPU using one of the methods described in the article on applying thermal paste.

        nothing

        Installation of the motherboard

        Preparing

        The necessary screws to secure the motherboard are provided with the computer case.

        To install the motherboard in the case, metal stands are used to raise the motherboard above the case. This is necessary to prevent the motherboard from coming into contact with the case.

        Before installing the motherboard, make sure that all motherboard standoffs are in place. Otherwise, the motherboard will lose its stability and sag under the cooler's weight.

        Installation

        You need to follow the same steps as when replacing, only in reverse order. Remember that it is better to connect the uncomfortable connectors first, and after that, cover them with a large cooling heatsink and a video card. Be careful of small things, and don't lose any screws.

Tuesday, October 10, 2023

External connectors and connectors of a personal computer


An interface is the boundary through which information is transmitted. In this case, it is the boundary between the computer jack and the wire connector.

nothing

Power cable connector and on/off button of the power supply

The IEC connector cable is used to connect the PC.

  • Main external connectors of the personal computer

nothing

  1. PS/2 port for connecting a mouse and keyboard.
  2. USB port.
  3. Serial port. This port allows you to connect your computer to an uninterruptible power supply, satellite receivers, cash registers. You can also use this port to connect two computers on the same network.
  4. VGA port. This is an analog connector for connecting monitors according to the VGA video interface standard.
  5. Microphone input.
  6. Line Input. This is a jack for low frequency audio signals. For example, the music center.
  7. An input for computer speakers.
  8. Connector for Internet cable.
  9. Parallel port. It is needed to connect various peripheral devices.
  10. Game MIDI-port. This port is used to connect an analog game console or music synthesizer / MIDI keyboard / MIDI controllers
  1. Connecting Cable for the PS/2 port
  2. USB Connector Cable
  3. Serial Port Connector Cable
  4. Connecting cable to VGA port for the monitor

5, 6, 7. Mini-jack connectors for audio devices

  1. Twisted pair cable to connect to the Internet
  2. Cable to connect the parallel port
  3. Cable to connect to the game MIDI-port
  • Connectors and cables for HDMI and DVI

nothing

  • Connectors and cables for additional interfaces

nothing

  1. USB-B interface connector and cable
  2. Micro-USB interface connector and cable
  3. USB-B Micro interface connector and cable
  4. USB Type-C interface connector and cable
  5. Thunderbolt interface connector and cable

Wednesday, October 4, 2023

Uninterruptible power supply


nothing

The main function of this device is to provide uninterrupted power to your computer or other devices during a power outage.

Working Principle

nothing

The device provides uninterrupted power from its built-in rechargeable battery. This battery generates a direct current, which the inverter converts into an alternating current of the desired voltage.

The computer connected to the uninterruptible power supply is normally powered by the mains and the battery is charged. If there is a power failure due to a power line failure, the computer is switched over to the uninterruptible power supply battery.

1 - Input power from the mains

2 - Charging unit

3 - Battery

4 - Inverter

5 - Automatic switch

6 - Mains filter

7 - Output power from the device to the equipment

The models of such devices are equipped with a light indication and audible alarm, which notifies you when autonomous operation begins.

The uninterruptible power supply autonomy time depends on the battery capacity level. The battery capacity is indicated in the certificate of the device or the specifications on the website of the official manufacturer of the uninterruptible power supply.  A five-minute run time is considered sufficient for the typical user, enough time for saving documents and shutting down the computer.

Types

Redundant uninterruptible power supply

nothing

It is a simple and affordable uninterruptible power supply. Its efficiency is about 60%. The network filtering is partial, which means that surges and interference in the network, which deteriorate the quality of the equipment, partially reach your computer.

Such an uninterruptible power supply is inexpensive and suitable for home use together with a PC.

Line-interactive uninterruptible power supplies

nothing

This type of uninterruptible power supply stabilizes the mains voltage using a switching device. If the mains voltage drops by more than 20%, the uninterruptible power supply automatically switches on and supplies power to the computer. The function of the switching device is to ensure that the UPS switches on only when the voltage is completely lost, not when it is reduced. Therefore, the output voltage of this type of uninterruptible power supply is stable. The efficiency is approximately 85%.

Double conversion uninterruptible power supply

nothing

This is the most reliable of the reviewed devices. The double-conversion technology provides almost 100% protection for the equipment. The current rectifier converts the incoming current from the mains to the direct current and the inverter converts the current back to alternating current. The batteries are installed between the rectifier and the inverter. Using this battery connection, delays when switching to stand-alone mode are minimized because the use of the inverter requires no additional switching.


Tuesday, October 3, 2023

Gaming Devices


The main difference between a gaming device and an ordinary device is the ease of use, ergonomics, and design. It should be pointed out that more high-quality and durable materials are used in gaming devices because they are subjected to high loads during the game.

Computer Gaming Mouse

nothing

The following factors are taken into consideration by the developers when designing a gaming mouse:

  • Analysis of a comfortable and ergonomic shape for the user, because gamers may spend a long time keeping the mouse in their hand. At the same time, the hand should not get tired of the mouse and it should not cause any hand diseases. Gaming mice are supplied with special 4-gram mouse weights that increase the mouse weight. Increased mouse weight gives the user a better feel of the mouse;
  • High-quality materials. Comparatively, the approximate number of buttons presses before they break down is 5 million times for ordinary mice, and 50 million times for gaming mice;
  • Mouse sensor accuracy. DPI (Dots Per Inch) is the number of dots per inch, it means how many dots the mouse sensor can count from the surface. Generally standard for usual mice is 800 DPI, but for gaming mice, this number is up to 12,000 DPI.  The higher this value is, the smoother the mouse cursor moves and the smoother the controller reads the user's hand movements;
  • Additional keys. These keys can be located on the sides of the mouse or on top of it. They are necessary for increasing mouse functionality. Additional keys can be set up for any command;
  • Bright and memorable design with RGB backlighting.

Computer gaming keyboard

nothing

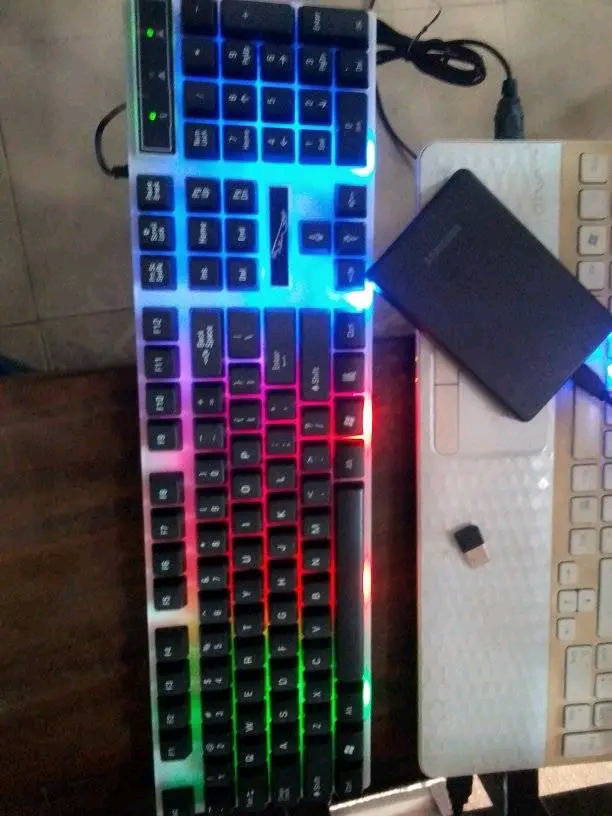
In addition to convenient shape, additional keys, and RGB backlighting, gaming keyboards mainly use mechanical key switches. They increase the lifetime of the keyboard.

nothing

Also, some gaming keyboards are equipped with additional USB connectors, as well as ports for headphones and microphones.

The gaming keyboard is characterized mainly by the wired type of connection to the computer. The wireless type of connection can cause delays in data transfer and the batteries in the keyboard can run out at the wrong time.

Audio gaming headset

nothing

Manufacturers pay attention to comfort and weight in the design of the audio headset. They use a wider range of sound frequencies and improved noise isolation from external factors

Gamepad

nothing

This is the main input device for game consoles, but it is also actively used in conjunction with PCs. The gamepad allows you to control your video game character more fluidly than with a keyboard and mouse, due to the force of the sticks.

Gamepads have several advantages over a keyboard and mouse:

  • The vibration creates a deeper immersion in the game;
  • Optionally, you can set the output from the monitor to the TV and play with the wireless gamepad from the comfort of your couch in front of the big screen.

Joystick

nothing

Game controllers are often called joysticks. However, this input device is designed for playing flight simulation games.

Car steering wheel and pedals

nothing

This device is designed mainly for racing games.  Combining the steering wheel, pedals, and a special fixed race seat chair creates the feeling of a real car in a video game.

What is computer security?

Computer security basically is the protection of computer systems and information from harm, theft, and unauthorized use. It is the process ...